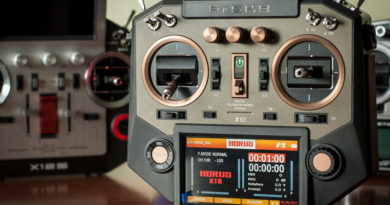
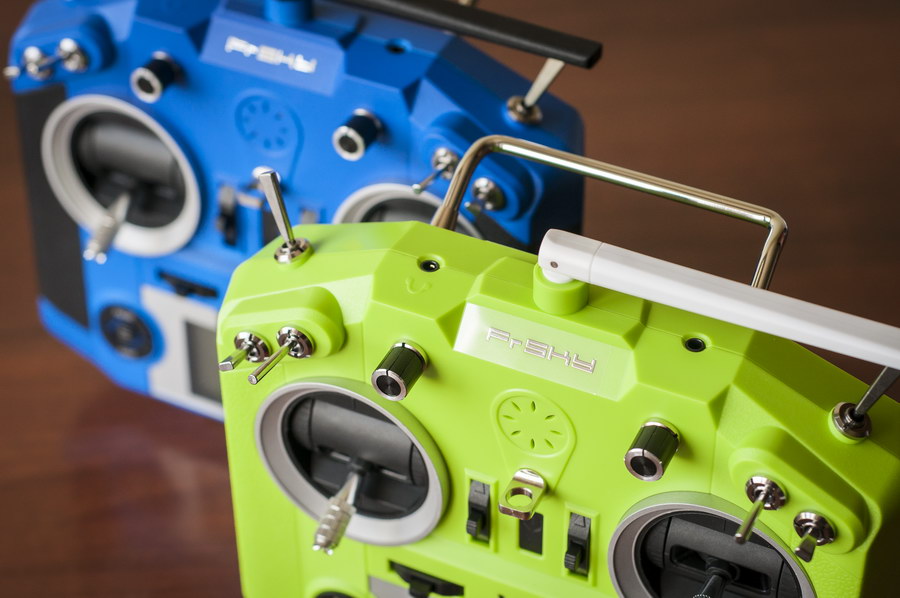
FrSKY M7 Hall sensor gimbals for Taranis Q X7 — the most important upgrade

It’s been a while since the time FrSKY has released their new and very succesfull radio — Taranis Q X7. Since that time, this radio has got one minor revision, conquered the minds of a large amount of fans and became on of the best selling radios available on the market!
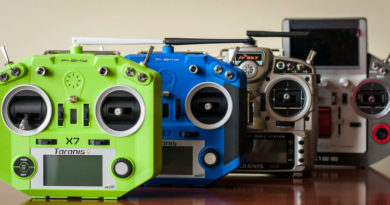
We’ve reviewed Taranis Q X7 half a year ago and you can read our initial review HERE and our additional early to late revision comparison HERE.
Half of a year passed. Radio works perfectly. But there was one little thing that we’ve been waiting for all this time — magnetic Hall sensor gimbals — M7. FrSKY has promissed to release such gimbals as the most anticipated upgrade for this radio since the time they have released the same gimbals — M9 — for Taranis X9D Plus.

Considering the fact that we have tried M9 with X9D Plus right after the release and found them to be perfectly smooth and precise which helped a lot during flight session despite of the type of a model used — we were impatiently waiting for the M7 to hit the market and make Q X7 just 100% perfect. And now, here they are — M7 magnetic Hall sensor gimbals arrived to our door and we want to share our opinion about this upgrade.

You can read our M9 Hall sensor gimbals for X9D Plus review HERE
If you would like to watch instead of reading — here is our video review:

Starting with the technical specifications:
- Supply Voltage (VCC): DC 3.0 ~ ±0.5V
- Sensitivity: 2.50 mV/G
- Linear Output Voltage Range: 0.1 ~ ( VCC +0.1) V
- Output Load Resistance (output to ground) >15KQ
- Quiescent Output (TA = 25°C, B = 0 G): 0.5 × VCC
- Noise (no load): ≤40mVpp
- Quiescent Output Power Supply Rjection: -69dB
Machanical:
- X-Axis Adjustable Angle Range: 60°±5°
- Y-Axis Adjustable Angle Range: 60°±5°
- Adjustable Height Range: 24.5mm-30.5mm
- Installation Dimension: 42.9mmx54mm
I would add some more features to this technical stuff:
- Hall sensor based gimbals (maghnetic field instead of mechanical friction in potentiometers)
- 4 bearing design
- CNC aluminum base for the overall stiffness and precision
- Aluminum crossbars for precision in centering
- All axis can be spring-loaded
- Adjustable tension and ratchet
- Stick tips with sharp edge design
- Adjustable stick length
- Aluminum crossbars are covered with rubber at the bottom part to have a soft stop effect when stick limiters touch it.
- Aluminum hollow stick shafts
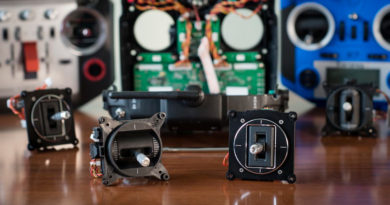
If we would like to compare M7 to M9 — we would see some differences:

which means that M7 would be a direct fit for the X9D Plus radio and M9 won’t fit into Q X7 radio. I know that there were some pilots who got tired of waiting for M7 gimbals to hit the market and they’ve decided to go along with M9 in Q X7 instead. They had to do a little mod to fit M9 gimbals inside. But my point of view was always the same — I’d like to have something finished and ready to go from the factory without moding…

Knowing the stated specifications and features, I can conclude the following improvements over original Taranis Q X7 sticks:
- M7 should be more durable — there are no friction electrical compenents that would wear over time. Hall sensors rely on magnetic field and don’t deteriorate because of the mechanical frictions.
- M7 should be more precise — same thing here — usual potentiometers would loose their layer due to friction, moreover it is in nature of the potentiometers to show some uneven figures and erratic resistance that gets even worse if heavily used. Hall sensors have even and smooth forces that result in more stable readings. Moreover, additional precision comes from aluminum base that makes the whole sturcture to flex less and aluminum crossbars that result in excellent stick centering.
- M7 should feel smoother — again, due to the absence of additional friction parts and stiffer machanical parts.
WARNINGS:
Keep in mind the 2 following warnings about Hall sensors technology:
- Do not overheat your radio. Natural magnets start to loose their magnetic characteritics when heated >70° Сentigrates. Do not expose your radio to direct summer sunlight for a long time.
- Keep your radio away from the strong magnetic fields — if the outer magnetic field is stronger than magnets used inside the gimbal it would result in reading inclinations.
One important note here:
Original Taranis Q X7 gimbals are not bad at all. Despite the fact that I’ve used this radio for half a year now, gimbals are perfectly stable at centers, return perfectly well to zero-values and don’t show any signs of erratic behavior or jittering around centers. The only main and apparent drawback in the direct comparison to M7 Hall sensor gimbals — is that they are not so smooth and feels a bit more flexible bacause of the all-around plastics design. Moreover, they would eventually deteriorate as the time passes. Mechanical fricting would never be so reliable as contactless sensors.

In the box:
M7 gimbal is sold as 1 separate item, packed into soft box together with the extra mounting screws. I would prefer if those gimbals were packed in some more reliable box but seems that there are no complains from other customers about that. In contrary to M9 boxes which had blue pictures, M7 gimbal boxes have orange prints.

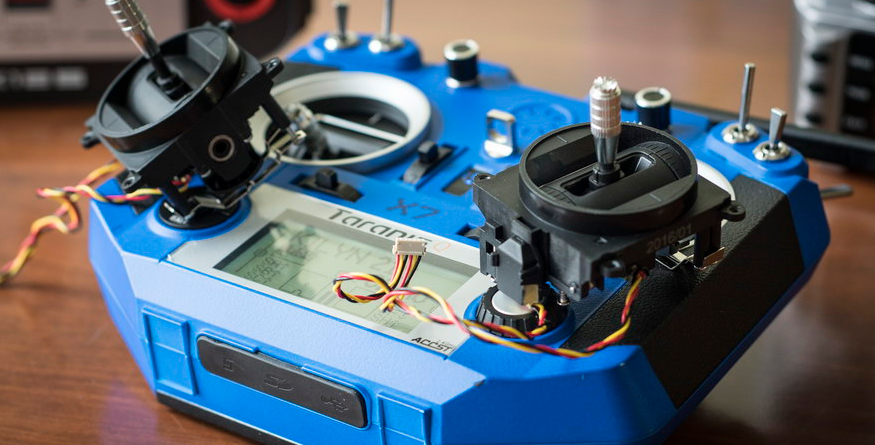
Installation process:
- 1.5mm hex screwdriver to adjust the spring tension and remove spring tension screw from Y-xis on throttle gimbal
- Phillips screwdriver to open the case and remove (install gimbal) + adjust throttle friction bracket
- 2mm hex screwdriver to adjust the length of the stick (inner small hex screw in the stick tip)
Nothing to worry about. Taranis Q X7 radio is very user friendly when it comes to dissasembling… There are four screws at the back that hold front and back parts or the radio together. But make sure to remove battery and external module bay prior to this.

When inside, there are 4 screws holding each gimbal to the front part of the case, 2 screws that hold special plastic cable wraps and 2 gimbal connectors that have to be removed from the mainboard and replaced with the similar connectors coming from M7 gimbals.
It took me about 15 minutes to get the job done and assemble everything back again. But there were some things that should be described:
- M7 gimbal cables are not very long. Shorter than I would expect. In order for the gimbals to work silky smooth and cables not to bend too much — I’ve placed the longer gimbal cables (side, Y-axis sensors) together with all other cables under the plastic wrap and the shorter cables (X-axis) were firmly zip-tied to the longer ones near the connector.

- M7 gimbals would not go so deep inside the gimbal podiums as it was with original gimbals. M7 would look as if they are placed too far from the face plate inside the radio. But it is normal.

- Prior to throttle gimbal installation — it is better to remove spring tension and adjust throttle friction bracket. First can be done by removing throttle axis spring tension screw from the gimbal, lifting crossbar all the way up and placing this screw inside the special hole inside the throttle crossbar. This screw will hold the crossbar at the highest position and would not let it interfere into the stick movement.
That’s it.
Comparing the construction of original and M7 gimbals — we can see the following differences:
- Min and max stick lengths are the same if both gimbals are placed on the same height. But considering the fact that M7 gimbals would sit 4-5mm deeper inside the radio — sticks become consequently shorter.


- M7 stick shafts are hollow inside and have a passthrough opening. It means that we would be able to have some further upgrades with additional switches and buttons at the stick top as it was seen in Horus X12S radios.


- M7 shafts have larger diameter and stock gimbal tips won’t fit.
Overall feel:
As expected — M7 magnetic gimbals are perfectly smooth, feel much stiffer and behave rock steady when looking at the channel jitter. From our experience with M9 gimbals placed inside our X9D Plus radio about half a year ago — such gimbal upgrade would result into more precise model control. And it really doesn’t matter which type of a model to fly. I’ve noticed the improvement right away with my bunch of FPV racers, while using the radio for simulators as well as with my RC heli models. Each stick input is silky smooth and results into predictable model manuevers. Hard to explain but it stick-movements-to-model-behavior became more linear and less erratic. Such feel was unreachable with the stock gimbals…

Magnetic field test:
I’ve taken small magnet from 2212 ruined outrunner motor and put it close to the gimbals:
- 1-2% reading inclinations on aileron and rudder axis when magnet is placed on top upper part of the aluminum gimbal base
- 2-4% readings inclinations on throttle and elevator axis when magnet is placed close to hall sensors on corresponding sides of the radio shell
- 0% inclinations when magnet is placed at the back of the radio shell (hall sensors are far away)
Conclusion:
FrSKY M7 gimbals is a must have upgrade for any Taranis Q X7 user. This upgrade helps a lot to master model control and worth every cent. And, to be honest, the price is very low — only $20,5/gimbal. Difinitely worth it. Especially if to compare with the prices for the same items of other brands. Have a set, try it out and be happy with your radio upgrade!