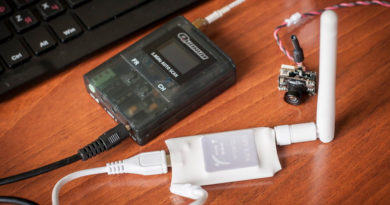
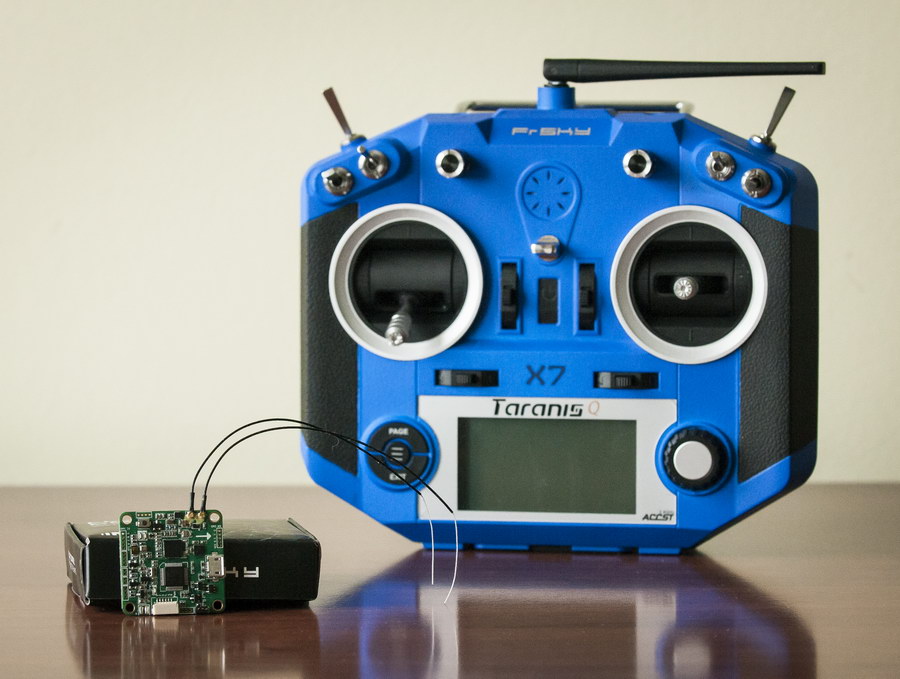
FrSKY XMPF3E or XSRF3E — F3Evo flight controller with intergrated receiver

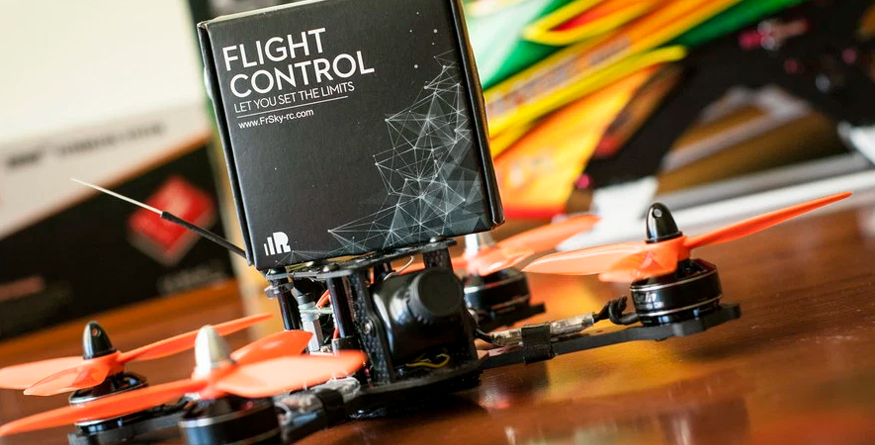
Recently, racing and acrobatic copters became very popular, especially small frames setups. Many events run worldwide, much competition on the market, lot of newcomers to start their r|c hobby in this segment. And if a year ago we would fly different setups and buy different frames and electronics, now most of the things have been brought to some obvious standards — 180-250 class frames, F3|F4 flight controllers, FrSKY Taranis radios, CleanFlight|BetaFlight FW, etc. This also leads to different manufacturers starting to present all-in-one electronic sandwaiches for copters equipped with different options to keep the weight down and maintain the ease of setup.

FrSKY would also jump into this boat and today I would like to introduce their new products — latest SpRacing F3Evo boards with integrated XM+ or XSR receivers:
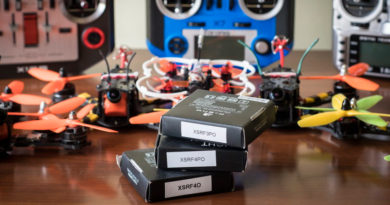
- FrSKY XMPF3E (F3Evo with integrated XM+, no telemetry, only RSSI to F3Evo, priced $35)
- FrSKY XSRF3E (F3Evo with integrated XSR, full telemetry, priced $42).
These long model names are just the abbreviation of two names — SpRacing F3Evo board and XM+ or XSR FrSKY receivers.


What is good about those products? XM+ or XSR receivers are intergrated to the latest F3Evo board, still keeping most of the additional features of both products.
Of course, SpRacing F3Evo and XSRF3E or XMPF3E boards are not completely the same. A slightly different layout and amount of I|O ports in favor of having built-in receivers. But most of the features are still there for the most of the user demands. It is not a compromise and you would not lack something in comparison to genuine SpRacing board.
Technical Specifications XMPF3E:
- 36×36×6mm (L × W × H) with 30.5mm mounting holes
- STM32F303 CPU (72Mhz inc FPU), MPU9250 (accelerometer/gyro/compass), and BMP280 barometer for F3EVO, CC2510 CPU for XM+ receiver
- 16CH (8CH is RSSI) by SBUS to UART2 Rx of F3EVO
- Voltage Range: 4.0~10V
- Current: 100mA@5V
- Supports: FrSky Taranis X9D/X9E/ Horus X12S/XJT in D16 mode
- Weight: 7g
- 6 PWM outputs from F3Evo
- Separate SBUS output port on the board for XM+ (upgrading and CH output)
- Blackbox microSD card onboard
- Full range receiver
- CleanFilght|BetaFlight ready (comes with Betaflight from the factory)
- Race transponder ready
Technical Specifications XSRF3E:
- Full telemetry downlink to|from UART3 of F3Evo
- 36×36×6mm (L × W × H) with 30.5mm mounting holes
- STM32F303 CPU (72Mhz inc FPU), MPU9250 (accelerometer/gyro/compass), and BMP280 barometer for F3EVO
- 16CH (8CH is RSSI) by SBUS to UART2 Rx of F3EVO
- Voltage Range: 4.0~10V
- Current: 200mA@5V
- Supports: FrSky Taranis X9D/X9E/ Horus X12S/XJT in D16 mode
- Weight: 6g
- 6 PWM outputs from F3Evo
- Separate SPort output port on the board for XSR (upgrading and telemetry output)
- Full range receiver
- CleanFilght|BetaFlight ready (comes with Betaflight from the factory)
- Flight controller PIDs can be configured with LUA scripts from Taranis radios over telemetry and SPort
- Race transponder ready
main differences between 2 boards are in bold letters.
As you can see from the technical description, the main difference between 2 boards is that XSRF3E does support full telemetry + OTA PID configuration over SPort and XMPF3E doesn’t do that (it can only output RSSI value to CH8 of F3Evo). But, at the same time XMPF3E has an additional feature — microSD card slot for blackbox logging. Hard decision, right? Either to go with full telemtry and buy separate blackbox or stick to onboard blackbox and have no telemetry, only optional OSD… It is up to you.
In the box:
XMPF3E comes in the box that includes a short user manual, 5 JST-SH sets of connector pins, JST-SH connector with 6 cables for PWM output and microSD card (1Gb) for blackbox.
XSRF3E comes in the same package but with no microSD card because it doesn’t feature onboard blackbox logger.
Features:
XMPF3E has the following layout that describes all the features it has:


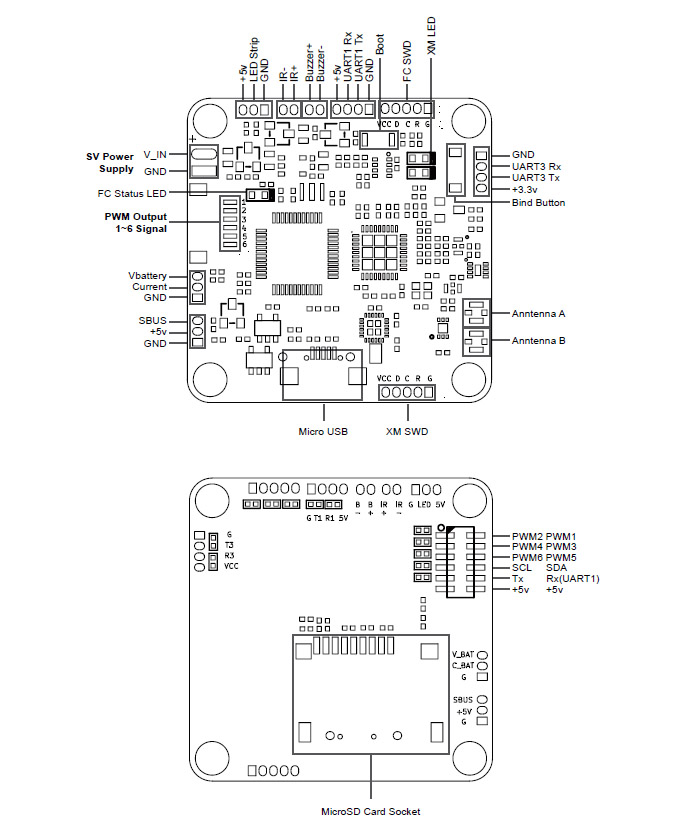
Besides having all the latest accelerometer/gyro/compass/barometer and blackbox logger, it also has additional inputs for:
- LED strip
- Buzzer
- Race transponder
- OSD
- Battery voltage and current monitoring
there are additional unused ports available for a user:
- UART3
- UART1
- SBUS XM+ output + upgrade
So, having everything described above you can make a 100% working setup with optional OSD, optional race transponder, onboard blackbox logging, optional buzzer, optional LED stips and so on. Moreover, you can have 16CH via SBUS output for your external devices and upgrade XM+ receiver with SBUS port.
XSRF3E has a slightly different layout:


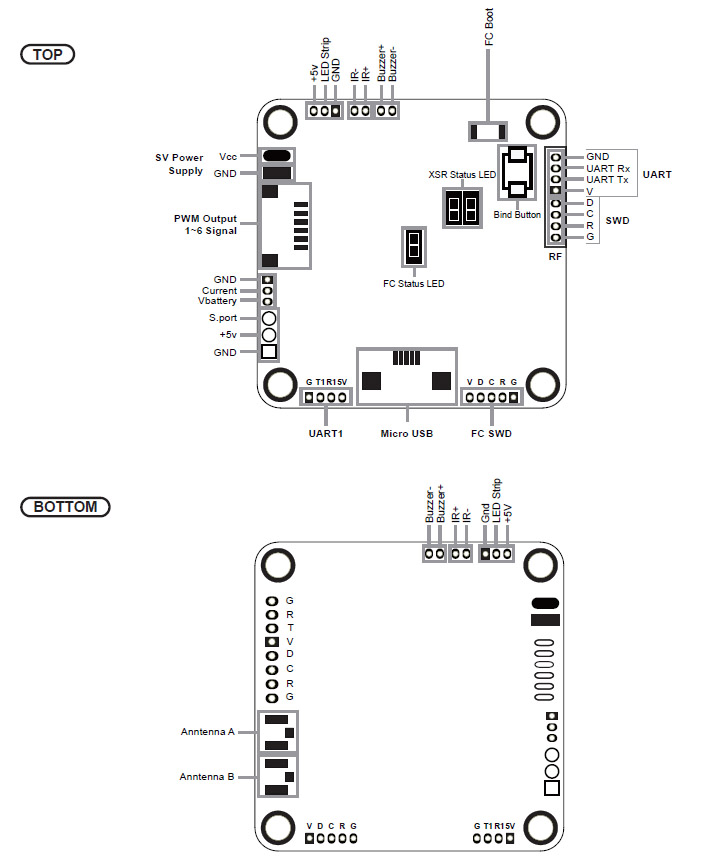
It also features the latest accelerometer/gyro/compass/barometer but with no blackbox data logger. And has additional inputs for:
- LED strip
- Buzzer
- Race transponder
- OSD
- Battery voltage and current monitoring
there are additional unused ports available for a user:
- UART1
- SPort XSR for telemetry output and upgrade
So, again, having everything described above you can make a 100% working setup with optional OSD, optional buzzer, optional LED stips, full telemetry link to your radio and so on. But with no SBUS CH output to external devices and with optional blackbox logger. Moreover, you can upgrade XSR receiver through SPort and output telemetry to external devices as well as to use OTA PID tuning from your radio. And the main feature in case of using XSRF3E — having all telemetry values from your F3E board to your radio via SPort telemetry. Which values? All described THERE. Probably, you would be aslo able to connect additional SPort sensors using SPort pins on the board. But this should be yet checked.
Made a wiring diagram:
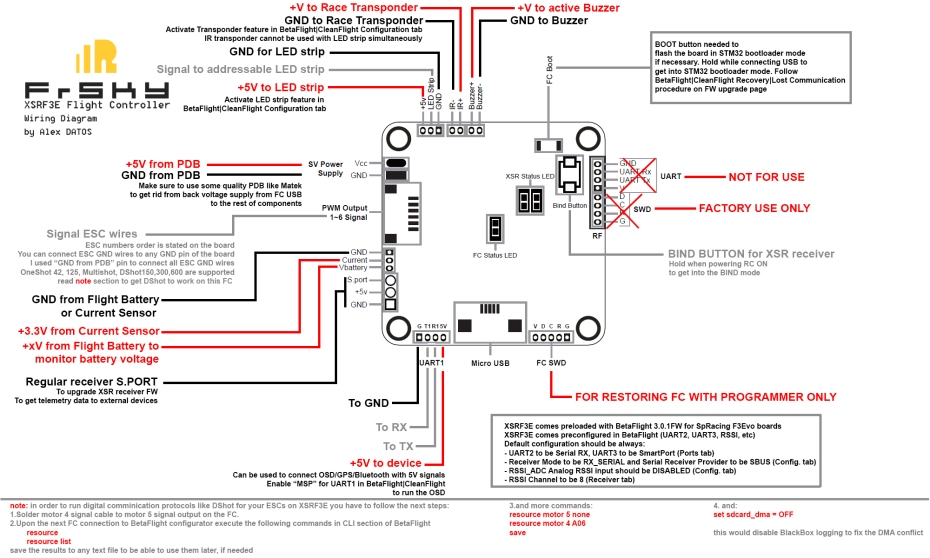
It is interesting that XSRF3E uses usual-sized servo pins for SPort output from the receiver on the board. XMPF3E uses smaller pins for SBUS port output.
Frequent question is where to connect ESC grounds to XSRF3E and XMPF3E — you can solder all ground ESC wires together and than to any ground contact of either FC, I prefer to solder it to incoming from PDB to FC voltage GND contact. Or, you can choose any other more convenient soldering GND pad.
FW setup specifics (CleanFlight and BetaFlight):
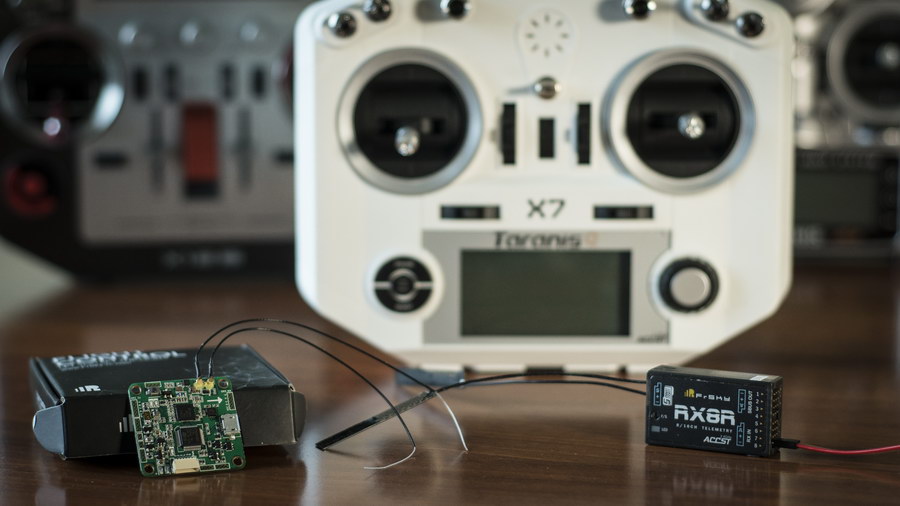
First, you have to bind your receiver to the radio in order to see channel monitor in the CleanFlight | BetaFlight FW. For this, you have a dedicated bind button on the board and 2 LEDs (red and green) as in any other FrSKY receiver. Press and hold this button while powering your board with microUSB, set your radio to D16 and bind mode, wait until red led on the board would flash and green would be lit, turn eveything of and turn on again. Bind is ready. Now, you can proceed to the CleanFlight | BetaFlight setup using your microUSB cable connected to the board (CleanFlight and BetaFlight GUI are the extention appllications for Chrome and could be found in Chrome Shop).
XMPF3E has the following musts on configuration:
- UART2 has to be confiugured as Serial RX
- Receiver mode should be RX_Serial
- Serial Receiver Provider should be SBUS
- RSSI_ADC Analog RSSI Input should be disabled
- RSSI channel should be 8
XSRF3E has the following musts on configuration:
- UART2 has to be confiugured as Serial RX
- UART3 has to be SmartPort
- Receiver mode should be RX_Serial
- Serial Receiver Provider should be SBUS
- RSSI_ADC Analog RSSI Input should be disabled
- RSSI channel should be 8 (or disabled. RX would still transmit RSSI value to radio without F3Evo board settings for this)
The main difference in this section is that UART3 port in XSRF3E board would be busy with SPort telemetry data coming from XSR receiver. Moreover, it gives you a great advantage — a possibility to tune board PIDs over the telemetry channel. To get this to work you should have BetaFlight 3.1 on your flight controller, OpenTX 2.2 with Lua support on your Taranis radio, have this script on your SD card in SCRIPTS/TELEMETRY (not more than 6 characters in the file name), set it in MODEL — Telemetry settings (Page 14|14) as one of the 4 dedicated telemetry screens… That is it! Or, in case if it doesn’t work — put it in SCRIPTS folder on your SD, navigate to SD card browser, find the script, execute it and have fun — checked — it’s working.
 photo source — flymod.net
XSRF3E telemetry:
The following sensors are transmitted back to the radio (partially taken from here):
- RSSI — seems to be sent directly to radio from receiver. Even with RSSI switched off on the F3Evo board — we still see the value.
- A4 : average cell value. Warning : unlike FLVSS sensors, you do not get actual lowest value of a cell, but an average : (total lipo voltage) / (number of cells)
- Alt : barometer based altitude, init level is zero.
- Vspd : vertical speed, unit is cm/s.
- Hdg : heading, North is 0°, South is 180°.
- AccX,Y,Z : accelerometers values.
- Tmp1 : actual flight mode, sent as 4 digits. Number is sent as (1)1234. Please ignore the leading 1, it is just there to ensure the number as always 5 digits (the 1 + 4 digits of actual data) the numbers are aditives (for example, if first digit after the leading 1 is 6, it means GPS Home and Headfree are both active) : 1 is GPS Hold, 2 is GPS Home, 4 is Headfree, 1 is mag enabled, 2 is baro enabled, 4 is sonar enabled, 1 is angle, 2 is horizon, 4 is passthrough, 1 is ok to arm, 2 is arming is prevented, 4 is armed
- Tmp2 (only of there is GPS sensor available) : GPS lock status, Number is sent as 1234, the numbers are aditives : 1 is GPS Fix, 2 is GPS Home fix, not used, not used, number of sats
- VFAS : actual vbat value.
- GAlt : GPS altitude, sea level is zero.
- GSpd : current speed, calculated by GPS.
- GPS : GPS coordinates.
Cels : average cell value, vbat divided by cell number. Didn’t find this. Seems to be Vfas or A4.- RxBAT : voltage of F3E
- Curr : current from main battery if sensor is used, unit in mA
- Fuel : something is provided but cannot figure out that yet
Flight setup and tuning:
I would not focus on this part because all settings, PIDs and configuration is done the same way as you would do it for any other board capable of running CleanFlight | BetaFlight FW. It is better to refer to FW documentation or SpRacing manual in order to understand how eveything works. Besides, I am still waiting for the new 210 frames from KDS Kylin… I would add some information here about my setup as soon as it would arrive and I’d manage to get it into the air. I have XSRF3E & XMPF3E boards from FrSKY and would use it as my next flight controllers (updated — setup is ready, written in the end of this review).
Upgrading receiver FW in XSRF3E and XMPF3E boards:
As usually, built-in receivers in both boards would be available as FCC and EU LBT versions of FW. Whenever you buy the wrong version, you would be able to upload the required FW and upgrade it in future.
In case of XSRF3E it is a straightforward — you have SPort pins (SPort, +5, G) on the board which you can use to upgrade XSR receiver from your Taranis radio or using Upgrade Stick or FUC cable.
In case of XMPF3E it is not so logical but still — you have SBUS pins on the board (SBUS, +5, G) which would act the same as SPort during the upgrade process. You can also use your radio or upgrade stick or FUC cable.
But remember, firmware for the receivers that are a part of F3E board is not the same as the FW for standalone XSR and XM+ receivers. If you’d just try to upload such standalone FW inside the built-in receivers — they wouldn’t work. There would be separate FW for receivers in XSRF3E and XMPF3E on FrSKY website.
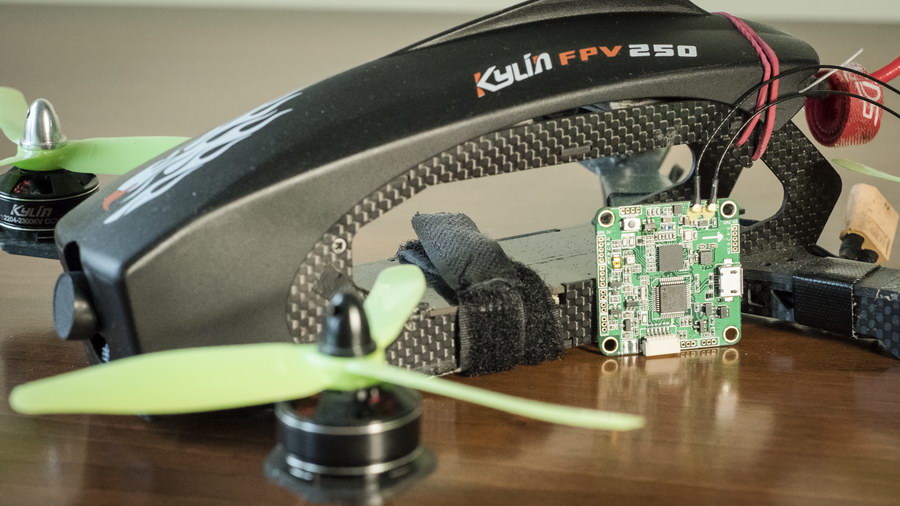
My current setup using XSRF3E board:


Frame: KDS Kylin 210
Cam: Foxeer 700TVL
VideoTX: 5.8GHz DalRC 600mW
Antenna: clover, Aomway
Flight board: FrSky XSRF3E (F3Evo with built-in XSR)
Power DB: FlyMod.net BEC/ZMR
Motors: KDS Kylin 2204 2300kv
ESC: KDS Kylin 20A OneShot125
LiPO: FlyMod.net 1,300mAh, 4S, 45-90C
Props: 5x4x3
Total weight (everything except LiPO): 300g
Flies great. Yes, I had to use some silicone dampers to mount the flight board, but see no problems with vibes after that.
Conclusion:
Both flight controller boards from FrSKY have detachable antennas. Whenever you’d kill one or both — you would be able to exchange it. Both have the same physical and mounting size. Therefore, the only decision you should make is about Telemetry + PIDs OTA configuration VS Blackbox. The rest of the features are almost the same.
So, what are the pros and cons of using XMPF3E or XSRF3E instead of SpRacing F3Evo?
Pros:
- built in 16CH SBUS XM+ or XSR receiver
- keeps the weight lower
- keeps the setup easier and smaller
- RSSI on CH8
- 16CH SBUS separate output for XM+
- SPort telemetry output for XSR
- external receiver still can be used
- price is very attractive
Cons:
- UART2 is busy with the receiver in case of XM+
- UART2 and UART3 are busy with the receiver in case of XSR
- 6PWM output instead of 8PWM
- No I2C for external screen or sensors
What are the pros and cons of using XMPF3E instead of XSRF3E?
Pros:
- microSD card slot for blackbox data log
- 16CH SBUS output to external devices
Cons:
- No telemetry
- No OTA PID tuning
What are the pros and cons of using XSRF3E instead of XMPF3E?
Pros:
- full telemetry to|from UART3 of the F3Evo
- SPort output to external devices
- OTA PID tuning
Cons:
- no onboard blackbox
That is all folks. Make your decision!!
You can buy FrSKY XMPF3E from FrSKY premium dealers
You can buy FrSKY XSRF3E from FrSKY premium dealers
FrSKY XMPF3E in the shop of my own preference
FrSKY XSRF3E in the shop of my own preference
Stay tuned, more to come…