Photo & Video rig for Y2026 build
Welcome all of my readers / followers and greetings with the past NY and Christmas holidays!
Today I am opening the new section of my blog, dedicated to photo / video camera rig, software and workflow that I would use in the upcoming year. But first, why and what is the background that makes me feel that I can share my opinions and thoughts to public:
I am not new to this field. I’ve been working as a professional photographer / videographer for more than 8 years and acting as a part time photographer another 10 years. By term “professional photographer / videographer” I mean that I was full time into that, taking and successfully fulfilling paid orders. The term “pro” for me is exactly the profession, rather than the quality of a rig, like many others believe. Yes, it definitely means that the “pro” person has more experience and understanding which gives an advantage to deliver higher quality of work even with the most basic tools. Some of my pictures below are shot with a regular smartphone from 2018. Creative approach, composition, understanding how to work with the available light or the ability to set the frame artificially, location and shot planning, clearly imagining the final result – are more important than having ARRI camera and no clue what to do with your frame.
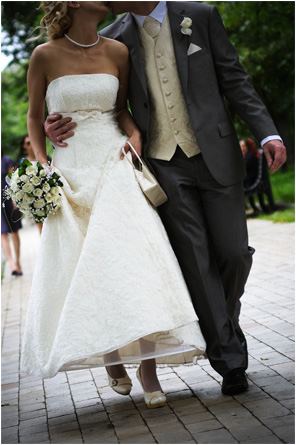
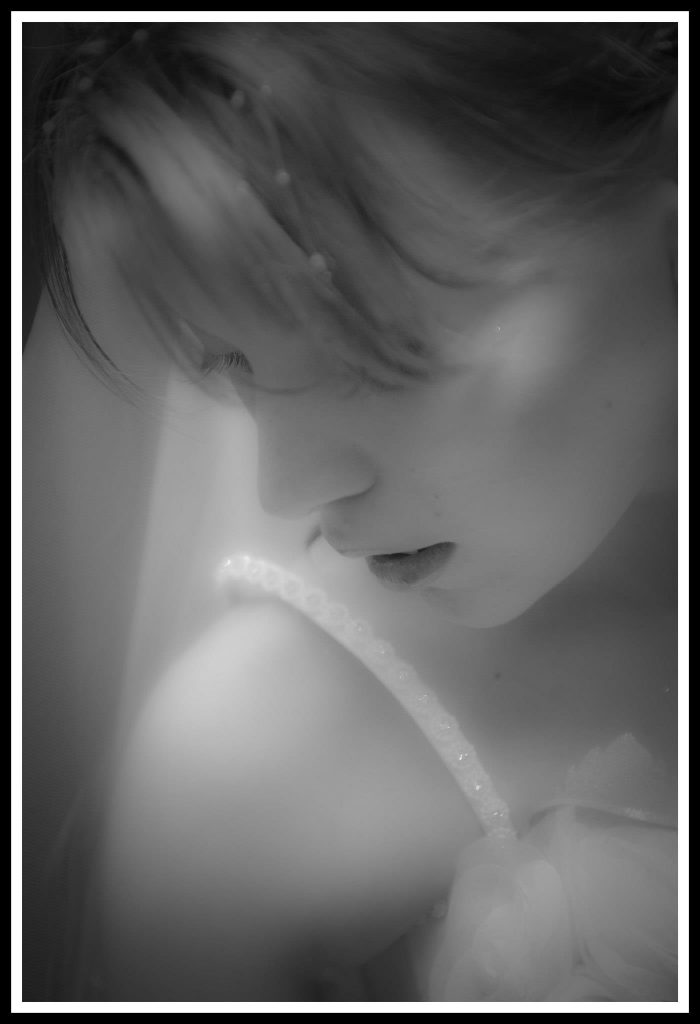
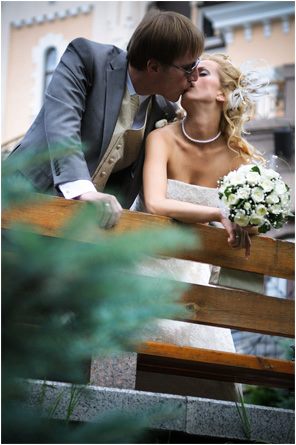
As a photographer, I was mainly dealing with weddings, model portfolios, animals, aerial panoramas and lots of product sample shoots for digital promotions. I’ve also worked for location company, that was searching, keeping and renting locations for movie production companies (I was responsible for location interior / exterior photos). As a videographer, I was mostly doing aerial videos from large and small copters and some ground work for different YT review channels. 99% of the product pictures in hundreds of articles of this blog has been shot / edited by me. You can also find many of those photos at different online shops or brand official websites.
Some of my photography works have been highly praised what brought me 7 awards in the photo contests which were held by different organizations in different countries. Examples are: Kenko/Tokina photo contest in Japan, Epson photo contest in CIS region, DPReview contests in England, several local Ukrainian photo contest like Steel Edge, etc.
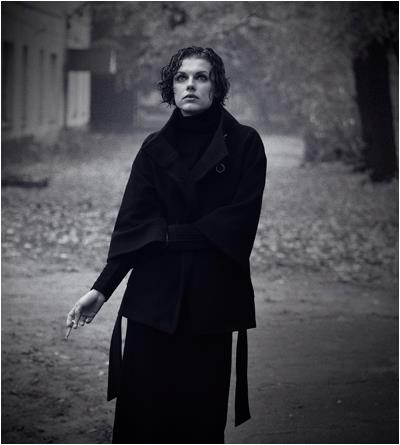
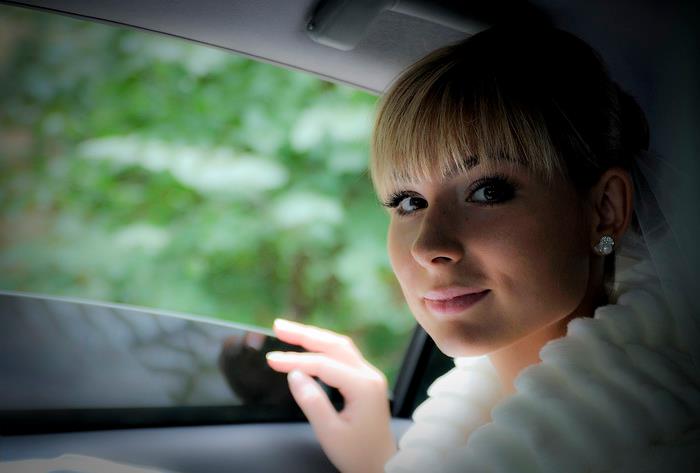
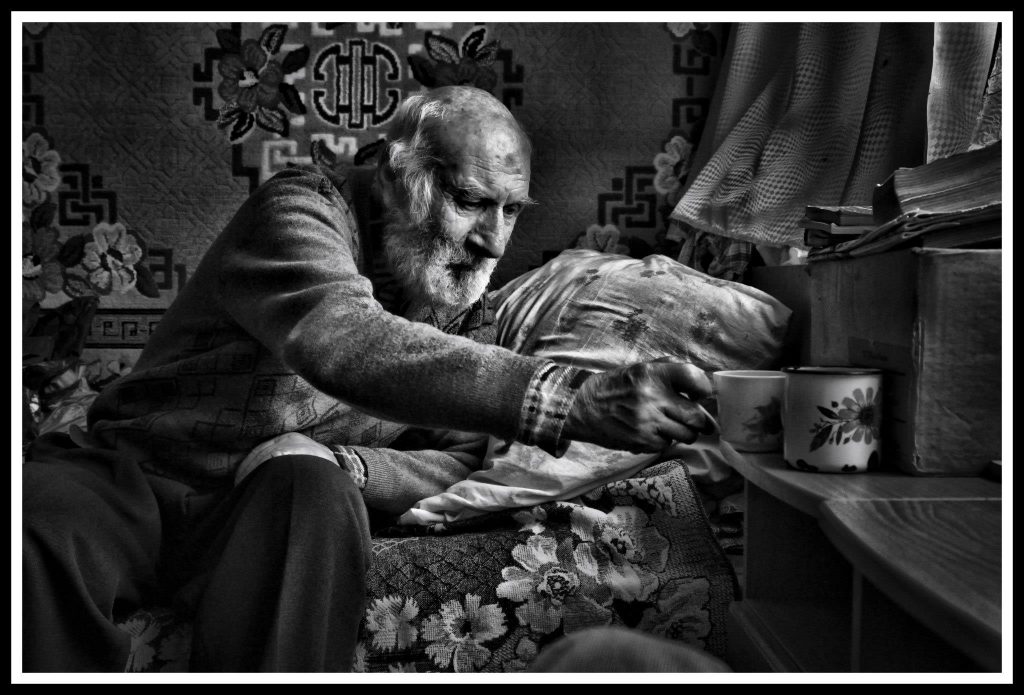
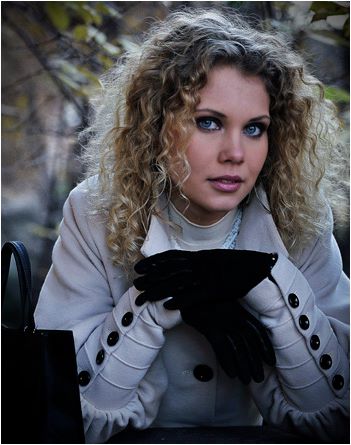
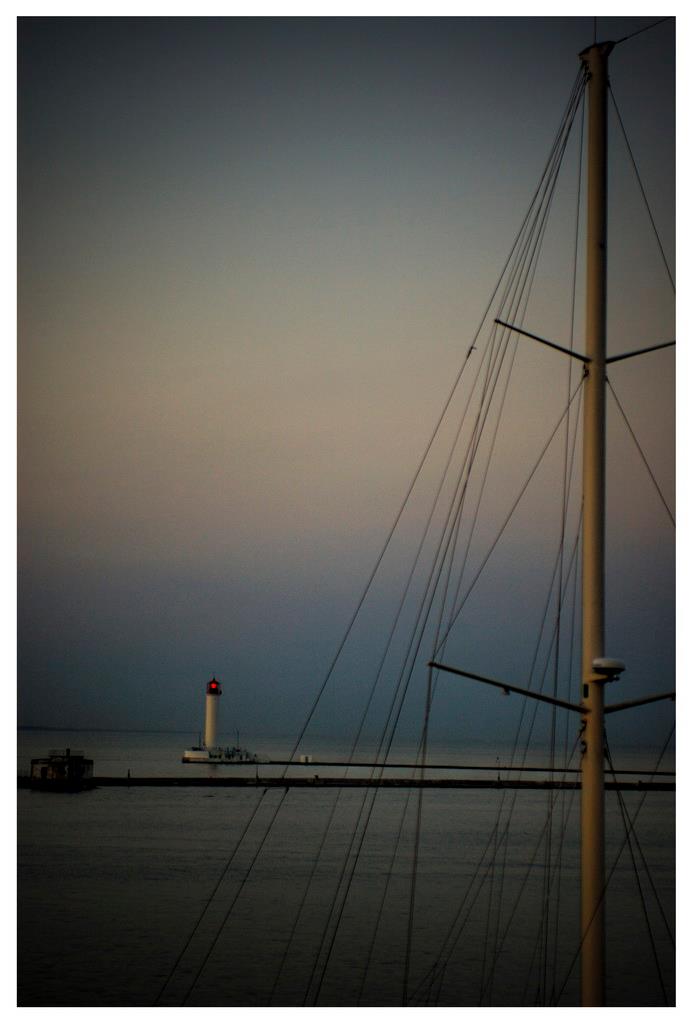
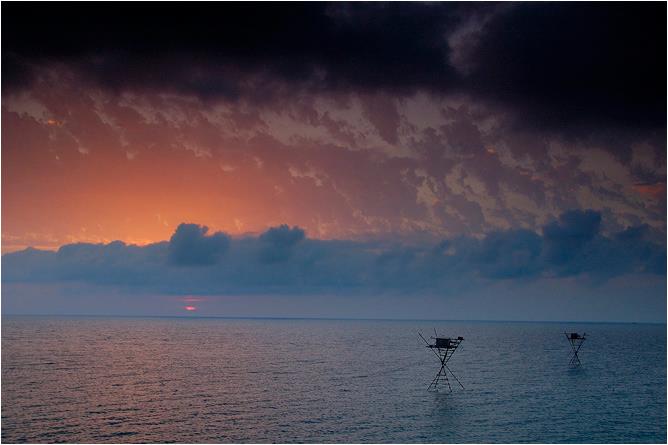
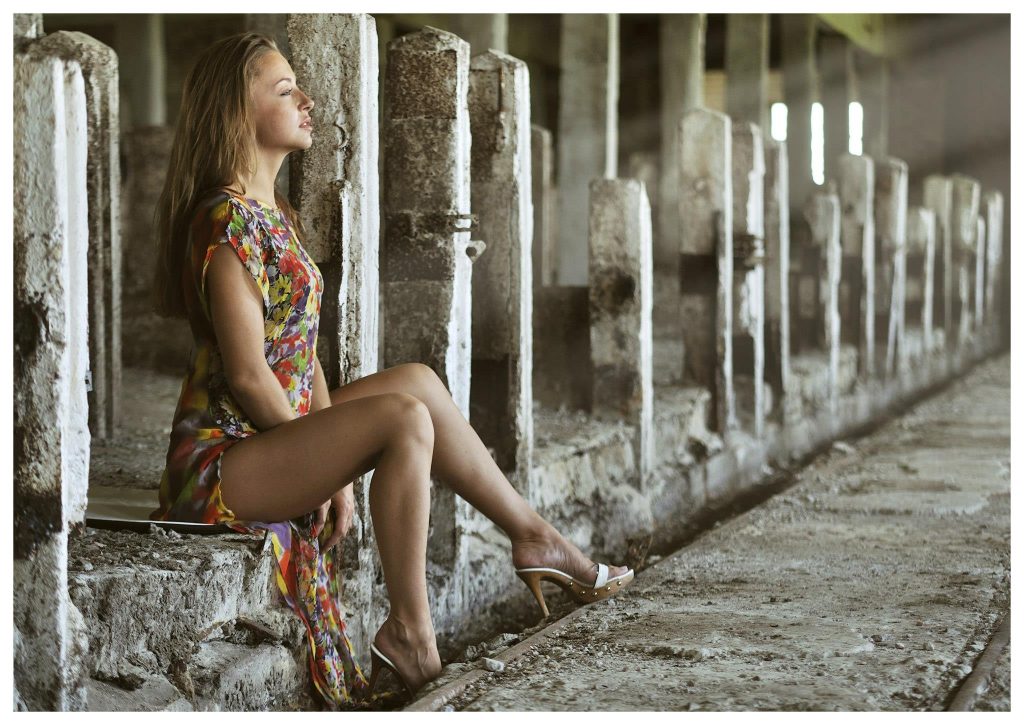
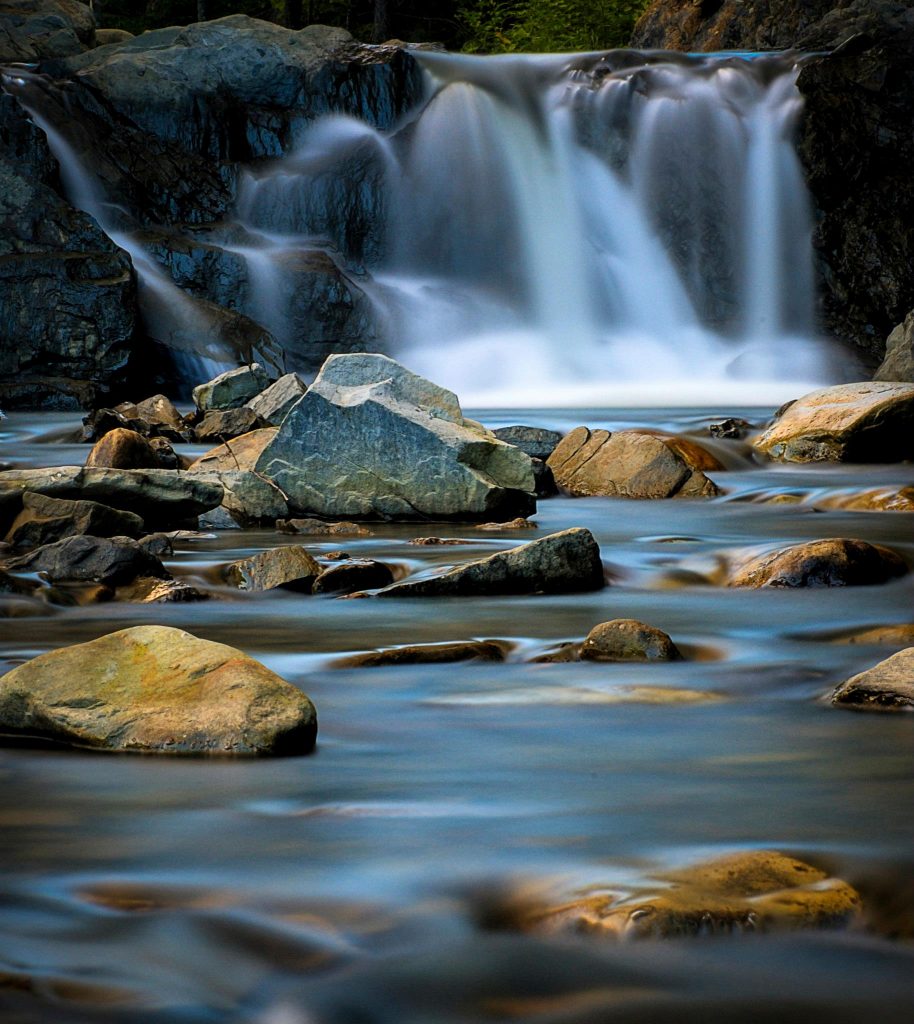
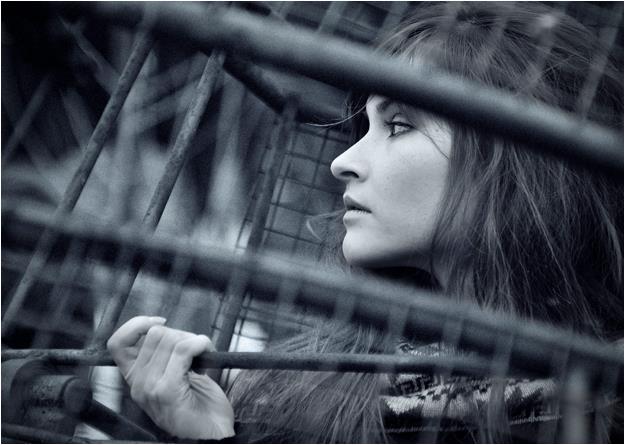
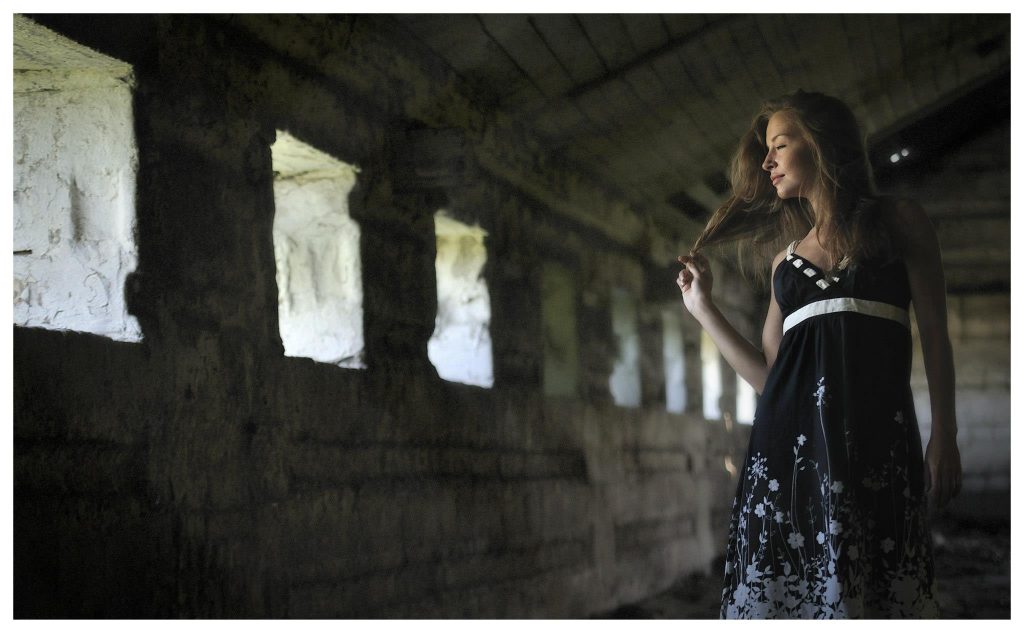
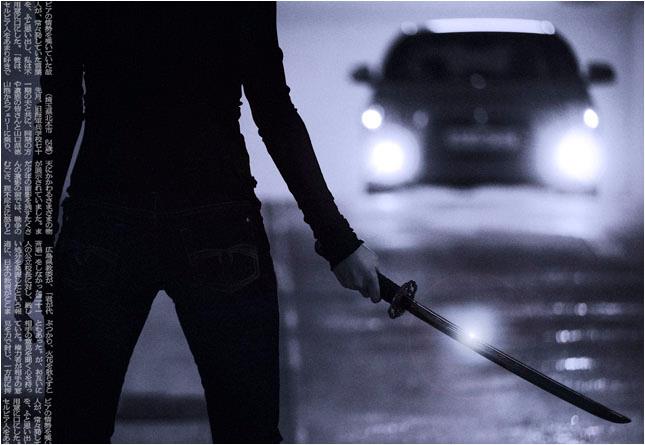
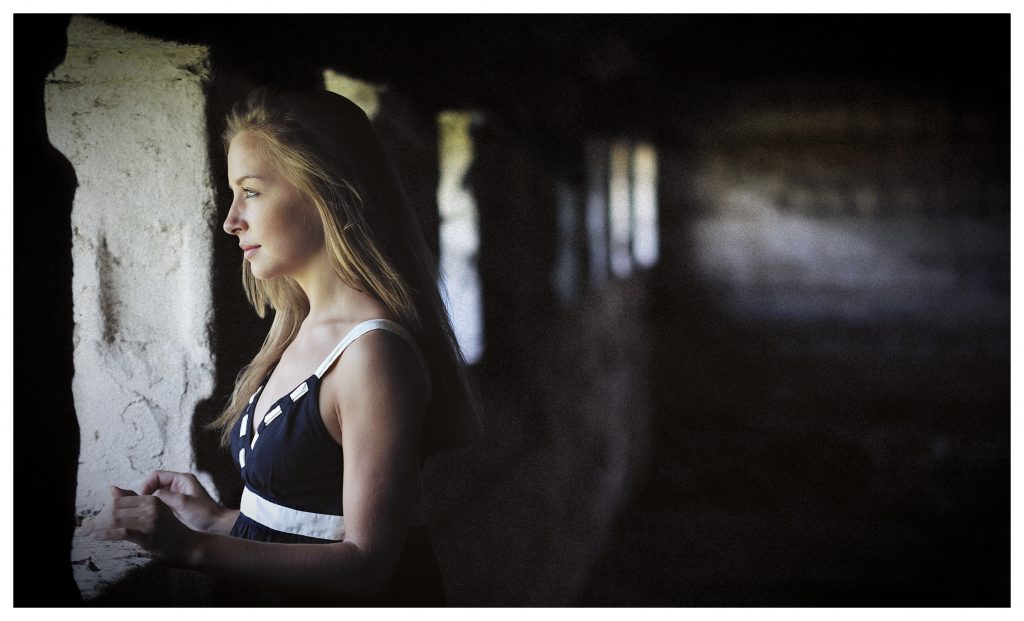
Here are some examples of my works:


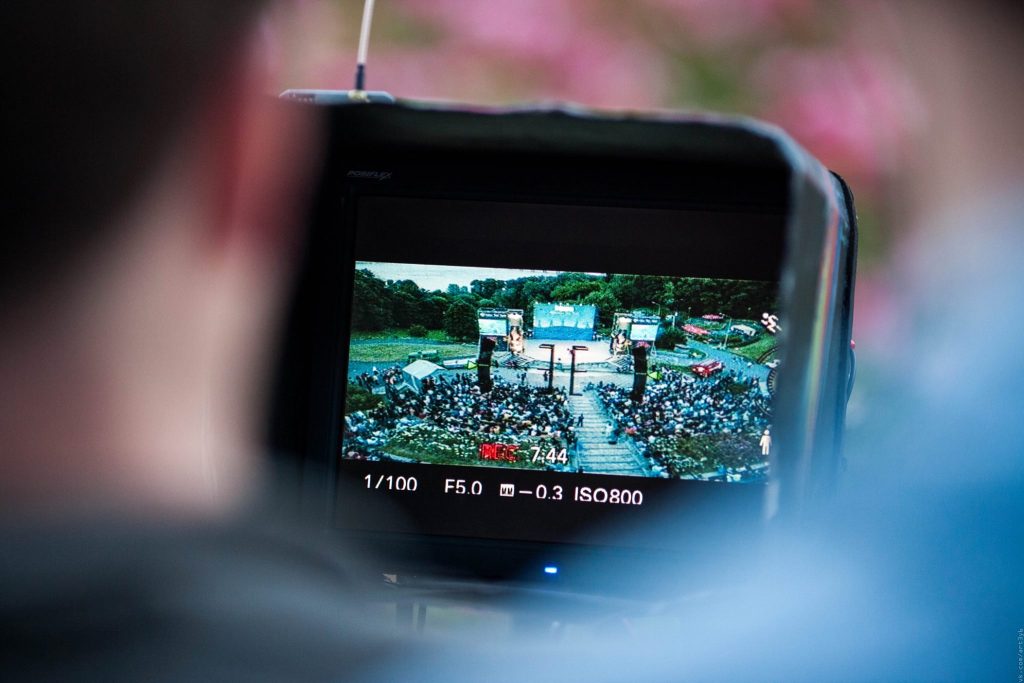
And here is one of the vids I’ve done for YT moto review channel (Honda NC700, Y2018), as an example:
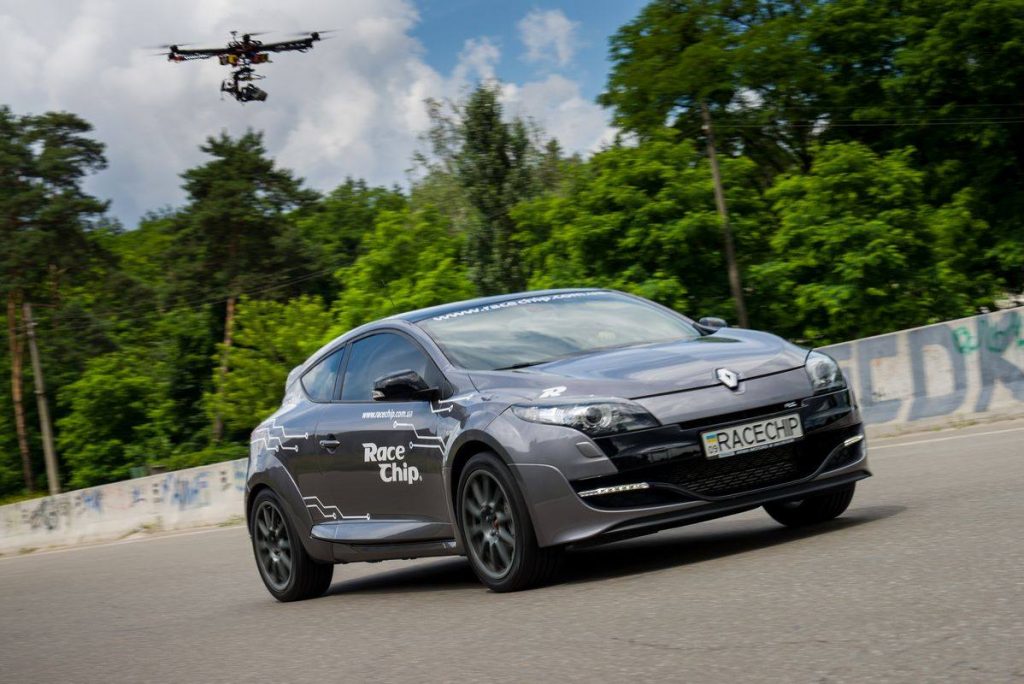
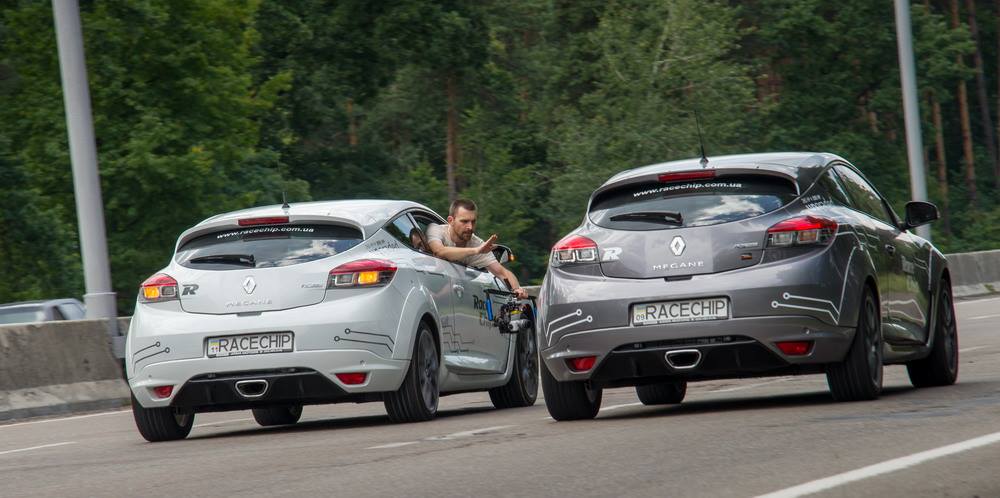
Some cuts from my commercial aerial shoots back in Y2014, based on DIY gimbal and hexacopter (Sony NEX-5T camera), long before large DJI cinematic rigs became a mainstream:
Despite always leaning towards the photography and the art side of it, video making has been the most interesting for me due to the entire process, complexity of the setups and final endless results in motion you can achieve. And after a long period or rare shooting occasions and completely different field of work, I am finally decided to get back into videography field. There are some reasons beyond the hobby since I am already doing some photos / videos for my main job, but I am planning to broaden my approach and to film some commercial and non-commercial works in the nearest future. Although, before jumping straight into accepting any commercial orders, I have to familiarize myself with the current tech, gear, possibilities, formats and workflows in order to deliver good results. I am staying fully self-conscious that I would have to go this path and learn almost from scratch since ground video work has changed a lot and I need to get used to the new approaches it is based on.
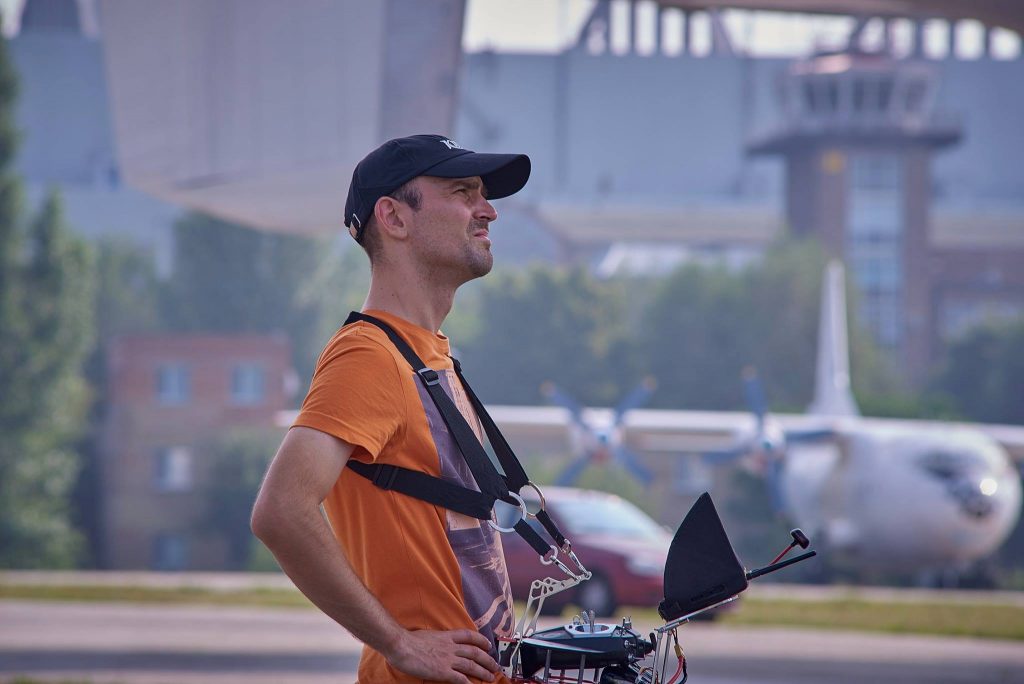
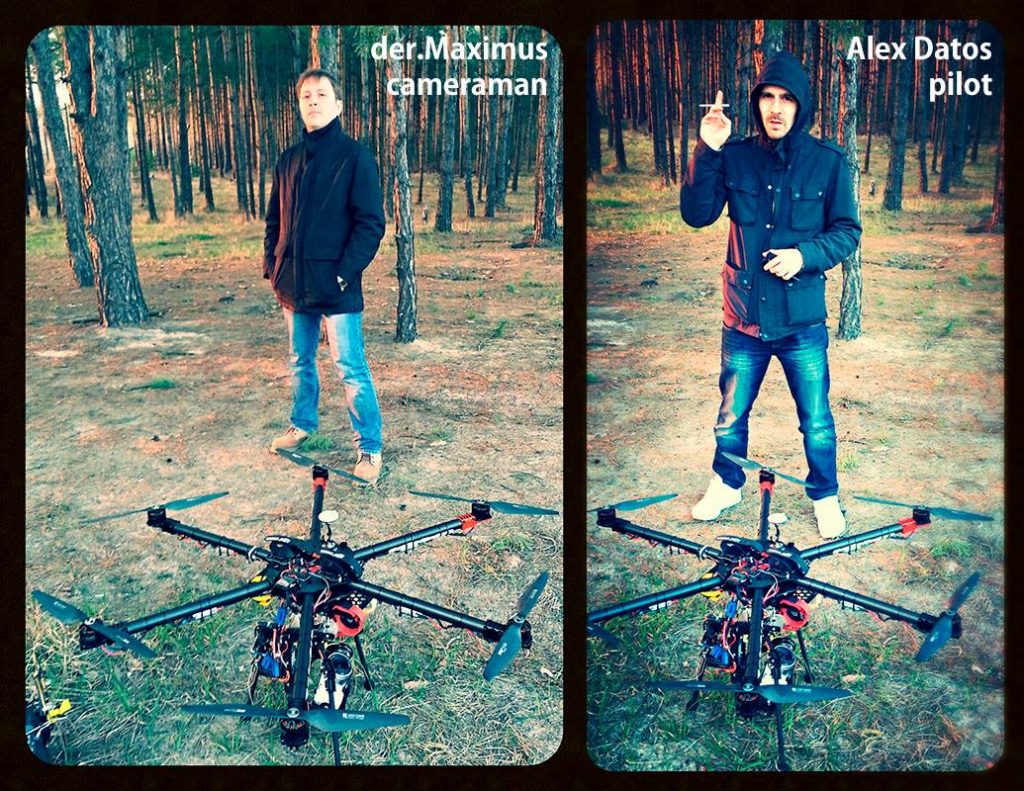
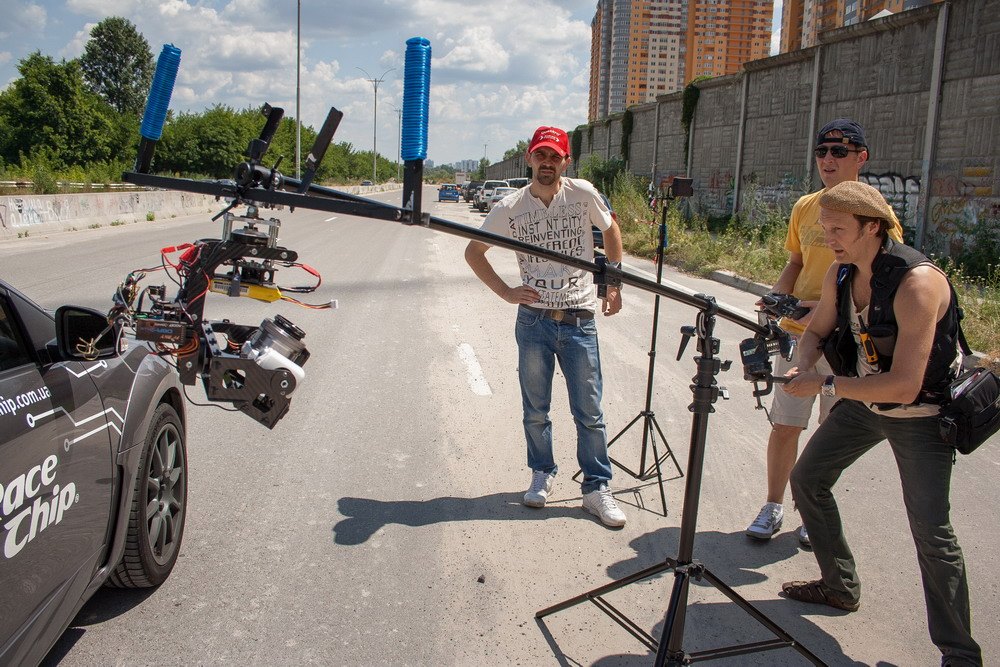
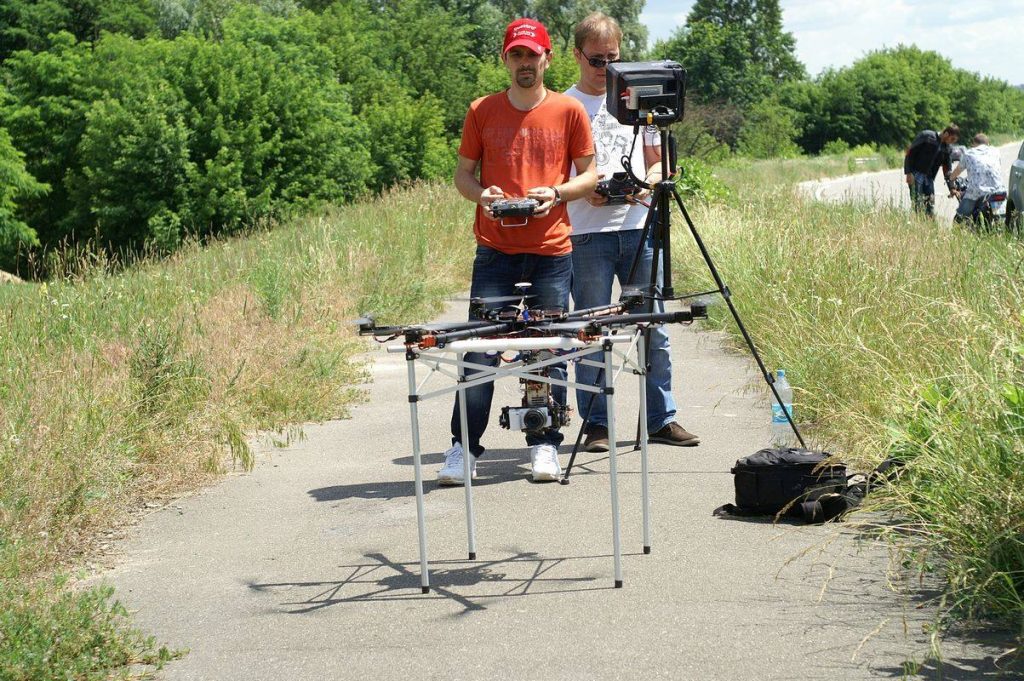
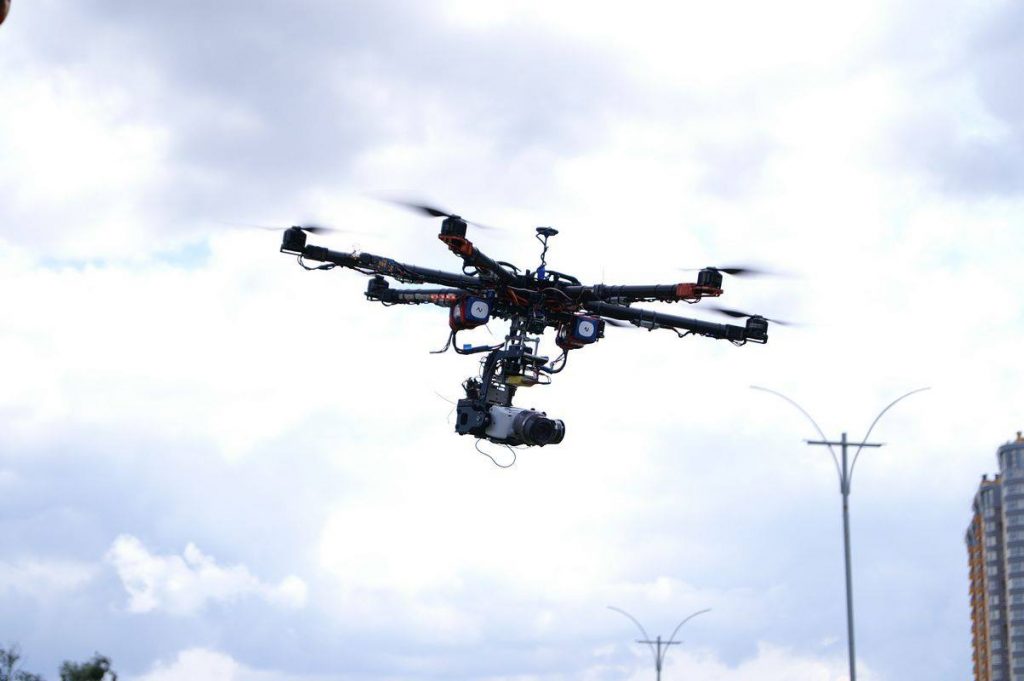
Some pics of me and my team doing some aerial and ground shooting long time ago:
So, the plan for Y26 is to get the right gear without breaking the bank and set myself on modern rails by learning and assisting on projects first, acting mostly as B-roll camera, with the further potential of individual works and clients. I’ve gone this path with the photography before and still believe that this is the best way to practice, have some good footage to demonstrate later and to acquire the necessary experience and confidence.
And finally, the reason for this article is to describe the components of my rig – it might help someone in the similar situation. It might also attract some valuable comments and advices from others.
Camera:
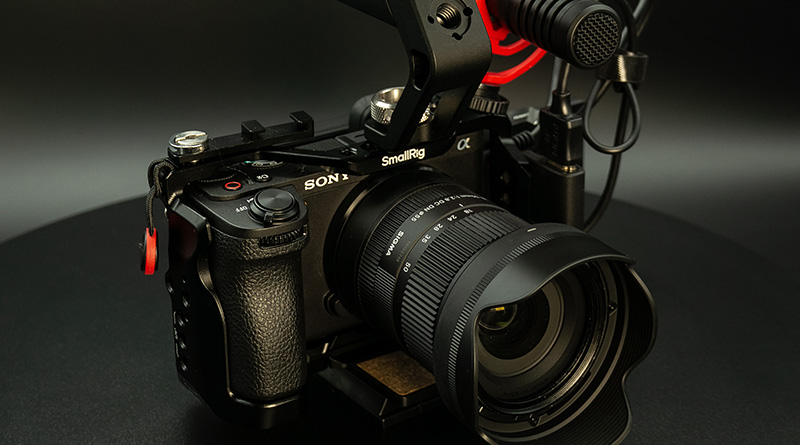
As a photographer, I’ve always been using Nikon as my main system. It was totally satisfying for me those days and there were no plans to shift BEFORE I’ve started to do ground and aerial videos. Since than, I’ve switched to Sony cause it had much better video capabilities back in the days. And even now, the army of Sony users is enormous and this brand rules in the beginner and semi-pro equipment. Yes, I know about all of those brilliant GHs by Panasonic, know the new Nikon ZR, know about the new Canon C50, etc. But since I’ve been staying with Sony for video since Y2014 – I’ve decided to go along with my choice.
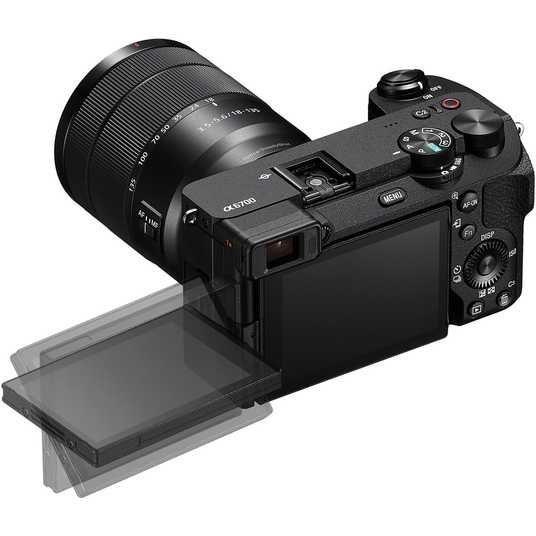
My camera now is Sony a6700. Why? Cause it is hybrid – good for both – photo and video. I don’t like ZVs and don’t want to invest (for now) in FXs and I am totally ok with APSC format. Therefore, the best hybrid is a6700, at least for me. The main reasons are:
- IBIS (in body image stabilization, 5 stops claimed)
- Best modern autofocus (face, eye tracking and AI subject recognition)
- 4K 50/60fps with no crop, 10 bit, 4.2.2. 120fps with 1,5X crop
- SLog3
- Custom LUTs
- Variability of codecs and bitrate (from 140 to 600Mbit/s)
- Small rolling shutter (14-16ms at 4K, 6-8ms at 1080)
- Large batteries
- Gyro data for further stabilization in Gyroflow
- Size and weight
- Connectivity options
- Weather sealed
- Price and lens selection
Cons:
- Micro HDMI instead of full-sized HDMI
- No built-in active cooling (manageable)
- only SD cards
Pros outweighs cons by miles. Moreover, cons are manageable and I will describe how it is done later.
As to the camera setup:
I’ve got V90 SD card which handles all of the camera potential. The highest bitrate of 600Mbit/s, S&Q, All-intra… And I don’t get why some people use V60 or even V30 with this camera. Why buying a6700 for video and not investing more into the most compatible storage? Anyway, cards are not cheap but acceptable. 128GB card would allow more than 1 hour of filming at max bitrate in 4K 50p 10bit 4.2.2 (not All-Intra).
Second, just dived in H.264 (XAVC S) V/S H.265 (XAVC HS) difference and planning to use H.265 from now on. It is preserving more details on moving subjects and better on color shifts but requires more from your PC while editing. Since I am already on RTX 5070 Ti (13700F CPU, 32GB DDR5 6000 RAM and NVMe SSDs) that has full hardware decoding support for both codecs in all of its forms (4.2.2 10 bits), I would stick to the newer codec. All-Intra is not an option for now since there is no material to film and grade with such quality. If there would be some commercial shoots where the highest quality is requested – I would probably go to All-Intra with the least amount of compression. H.265, 4.2.2, 10 bits, 25/50/100p in Slog3.Gamut.Cine with the highest bitrate are all main options now, depending of the subject.
Other camera settings are common for most of the users: continuous AF with eye, face priority and touch point subject tracking, sometimes manual (about that later), PP with Slog3, Slog3 display assist to REC.709, Zebra on 70 (skin tones) and lower limit on 94+ (highlights max in Slog3 before clipping), base ISOs (800 or 2500), 180 shutter angle.
Why PP + display assist instead of a dedicated LOG shooting and own LUTs:
- I don’t like to sharpen in post and leave sharpness at 0 (not -7) in PP
- Zebras meter Slog3 footage when using PP and display assist, rather than metering LUT when shooting in Log and applying LUT
- HDMI outputs 4K instead of FHD
tell me if I am wrong with anything stated above. If one day I’d find some creative LUT to stick with, I might switch to LOG shooting since it is the only possibility to have custom LUT over the picture in camera.
Small additional tips on camera setup: I’ve split main photo and video settings (there is such possibility), set each video and photo mode which I want (ISO, framerate, codec, bitrate, shutter, focus, pp, etc) and assigned to 1/2/3 memory recall slots on the upped dial. Now, for example, to switch from 25p to 50p to 100p – I need to rotate this dial from 1 to 2 to 3 only, when sub-dial for photo/video/s&q is in the video mode. The rest of the settings would change accordingly to the slot selected and what you have saved there. Fast and convenient way to quickly change settings without going to the menu. It is also handy when you are looking at external monitor with full screen picture / clean output which is not showing you camera menu (if hdmi output is not clean and you want menu and all other overlays to be shown on the external monitor – you’d end up with different aspect ratio and partial fit of the picture to the monitor, which is not good).
Lenses:
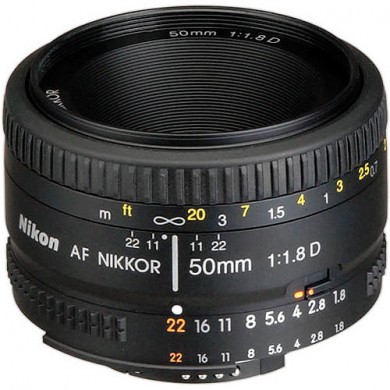
Using 3 lenses: Sigma 18-50mm F2.8 as the main one, Sony 18-135mm F3.5-5.6 OSS as B-lens, Nikkor 50mm F1.8 on rare occasions, just because I love it and have it. It is on the manual Fotga adapter.
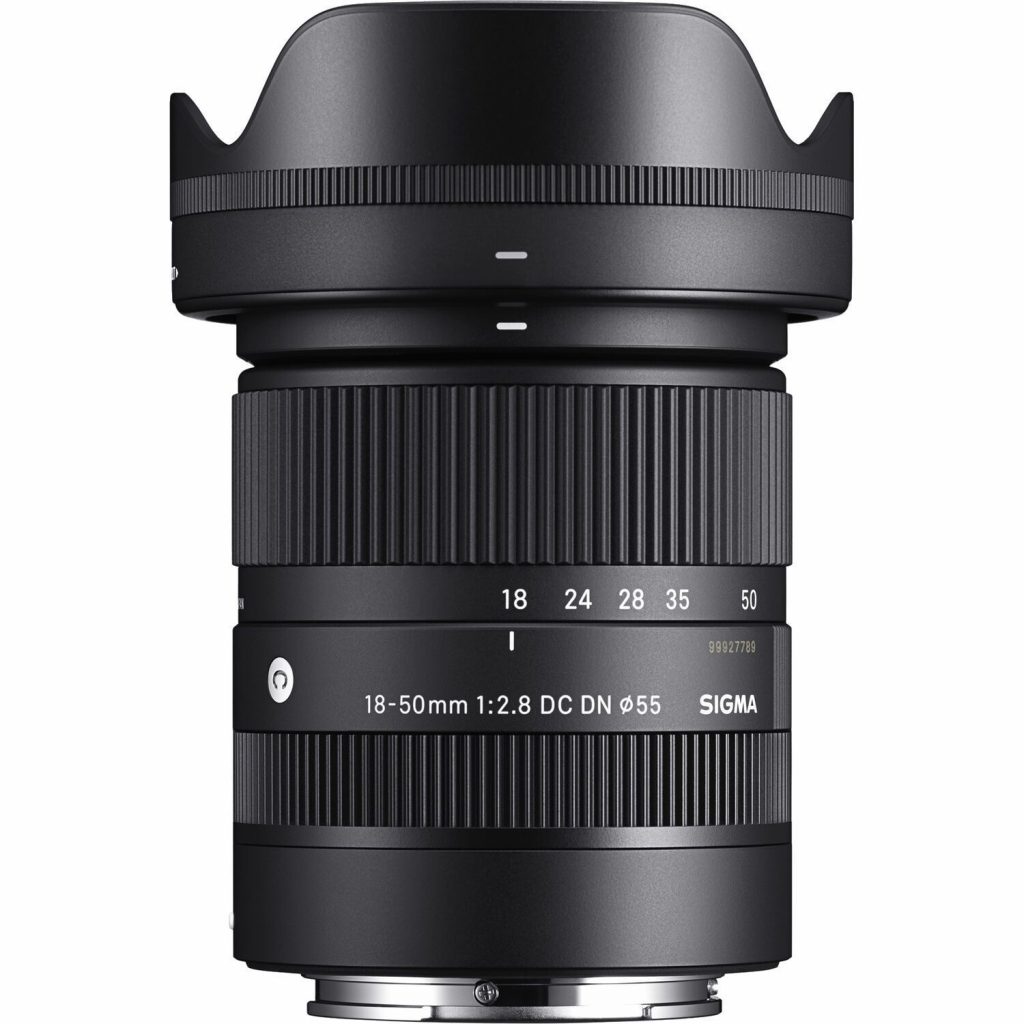
Sigma 18-50 has its reasons: it is quite inexpensive but covers good angles, has a constant big aperture and it is small and very lightweight. This is a very big advantage when planning to work with stabilized gimbals. It is also excellent for photography: great contrast and sharpness across the range, plus almost absent focus breathing (change in picture plane while pulling focus). Disadvantage is that it doesn’t have optical stabilization, but even if it did – the quality of OSS in third-party lenses when used on Sony cameras is significantly lower in comparison to Sony native ones.
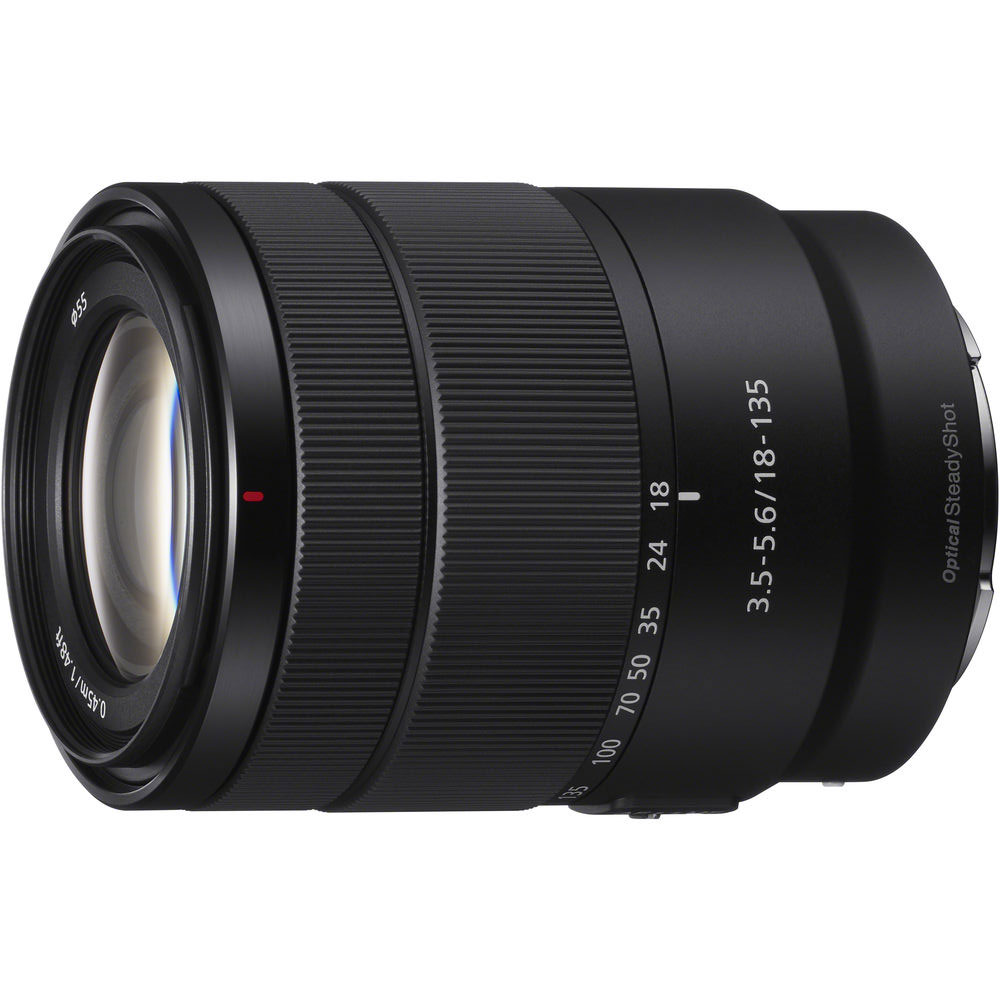
That is why I keep 18-135mm F3.5-5.6 OSS Sony lens. It is doing a great job on stabilizing the video together with IBIS, covers more range and decently sharp. Despite its variable and quite small aperture, it is still good for daylight videos, especially “run and gun” style when you still have to close down the aperture. Moreover, Sigma and Sony have similar filter diameter and both are compact, which makes them a good pair if you want to save on NDs, CPLs or to easily balance both on the gimbal.
Nikkor would be used for low light and interviews where the more shallow depth of field or more light is required. Since it is manual – I would have to use it with follow focus system. About that later.
I am also planning to invest into some Viltrox fix-focal prime lenses (17 or 20mm / 1.2-1.7 aperture value) for low light situations and to get the maximum bokeh and sharpness. Those are excellent at only a fraction of cost and deserve to be the main choice for primes.
Lens accessories:
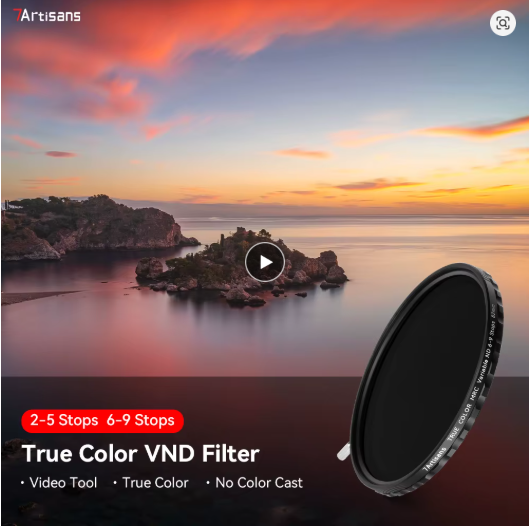
NDs, VNDs, CPLs, UV protection filters are a must. NDs (neutral density) and VNDs (variable neutral density) filters are necessary to keep open aperture for the sake of shallow depth of field and pleasing bokeh, simultaneously maintaining 180 degree shutter at base ISO. Without ND/VND you would have to either close the aperture, bring down ISO or raise the shutter in bright light, which is not acceptable. I’ve got 7artisans 2-5 and 6-9 VNDs for the great reviews and good price. You can watch this helpful video and decide for yourself: (the choice of VNDs, CPLs and even UV is a responsible step, as it would directly affect picture quality)
I’ve got 67mm versions of VNDs and step-up rings from 55 to 67 due to 2 reasons: one is that when using larger filter you would work mostly with the central part of it and reduce vignetting further. Secondly, simply because not every manufacturer produce filters smaller than 60mm. Filters come with hoods, so there is no problem with protecting it on the lens.
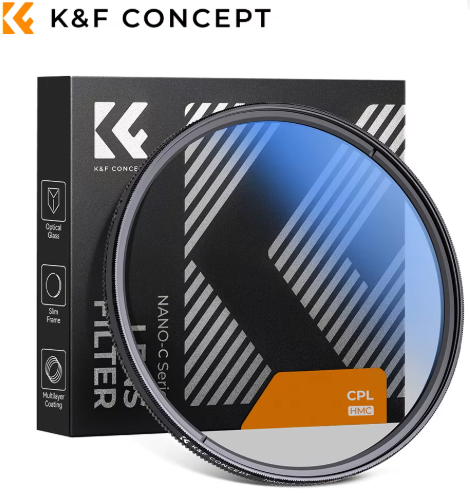
CPL (circular polarizer) is necessary to reduce the amount of reflections and flare from the objects and also effective in giving more depth to some colors at certain angles. I’ve got one 67mm from K&F Concept.
And also got a couple of UV lens protection filters (55mm) just to keep lenses clean.
I would also have to get some universal rubber lens hood that would go over enlarged 67mm filters and fit the lens to protect it from direct light sources and flares. Haven’t found one yet.
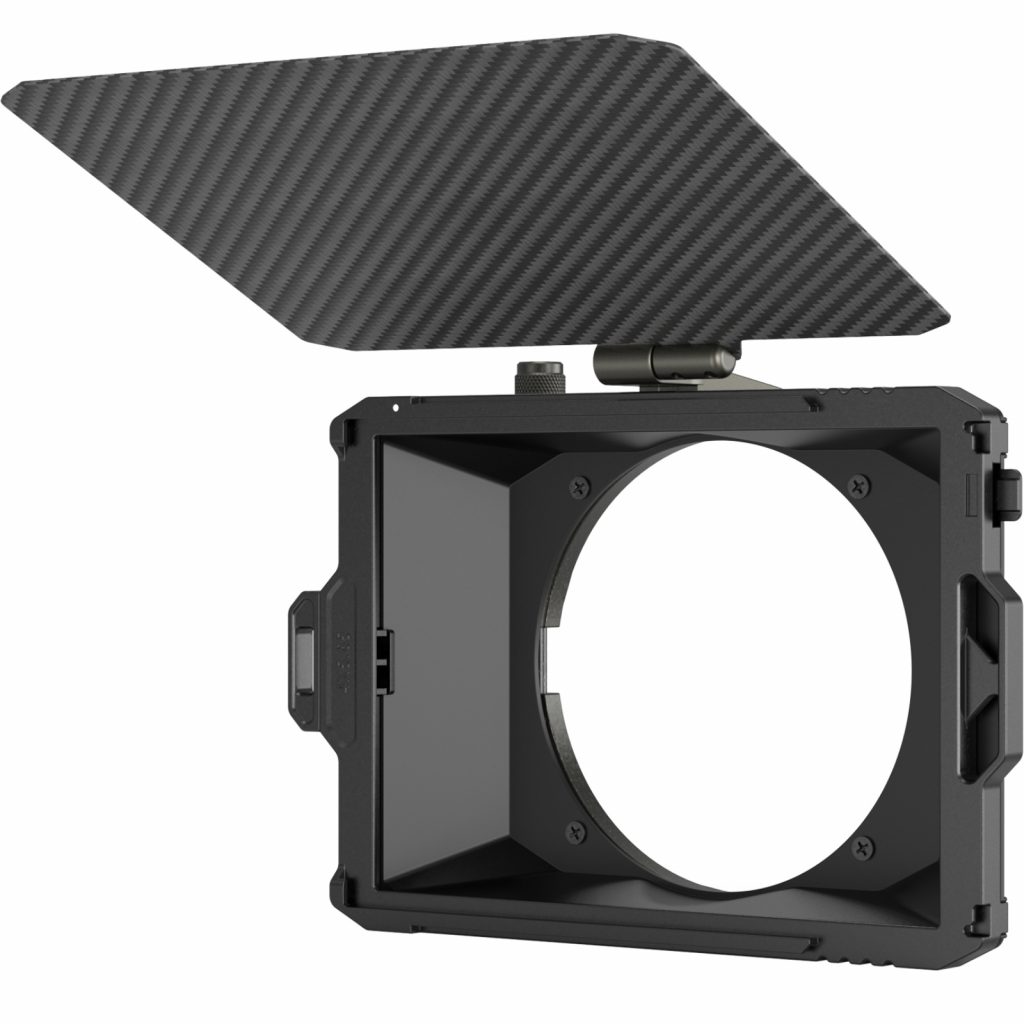
There are compendium systems (matt box) that are often used while filming and that substitute circular filters and lens hoods. But I don’t like this idea since it is quite large, expensive and requires special drop-in filters. At least, not at this stage.
What else necessary:
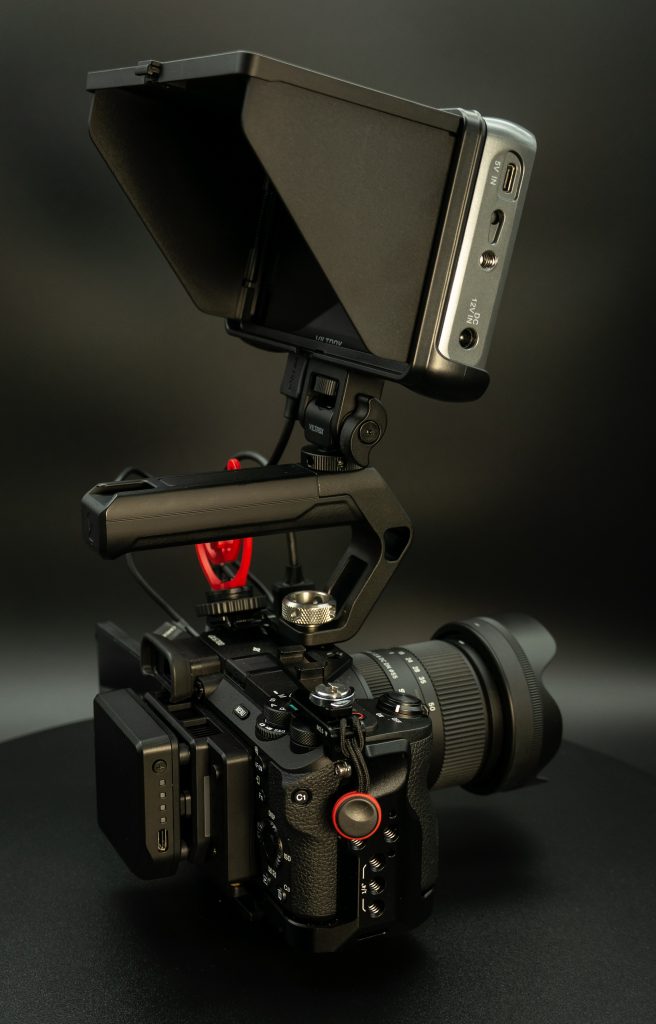
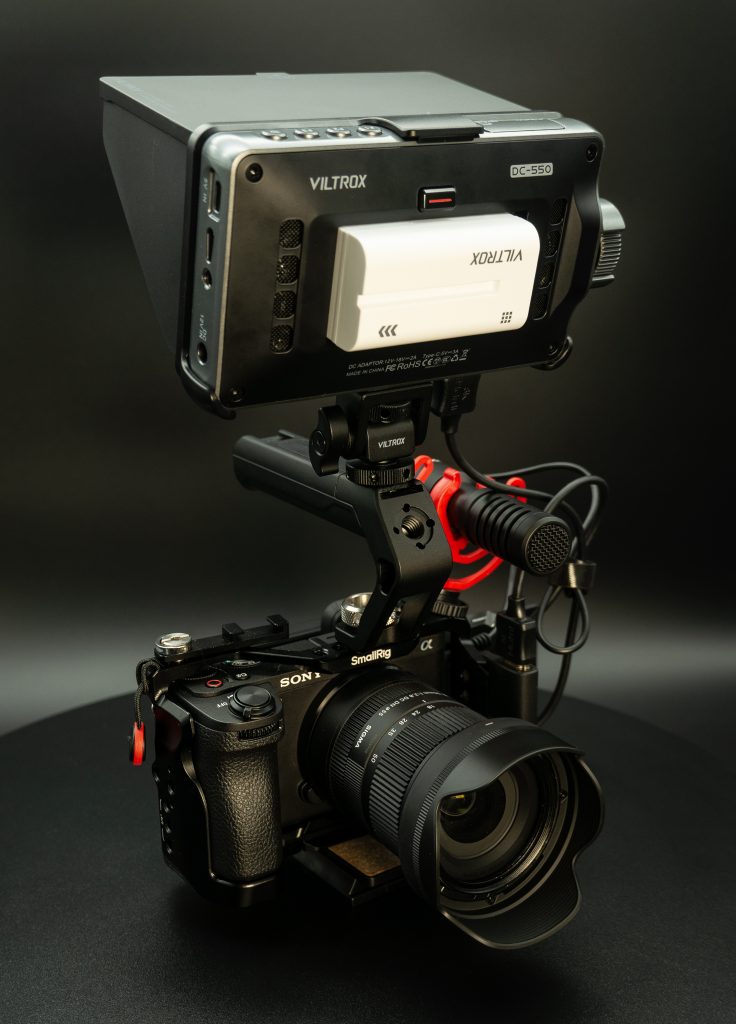
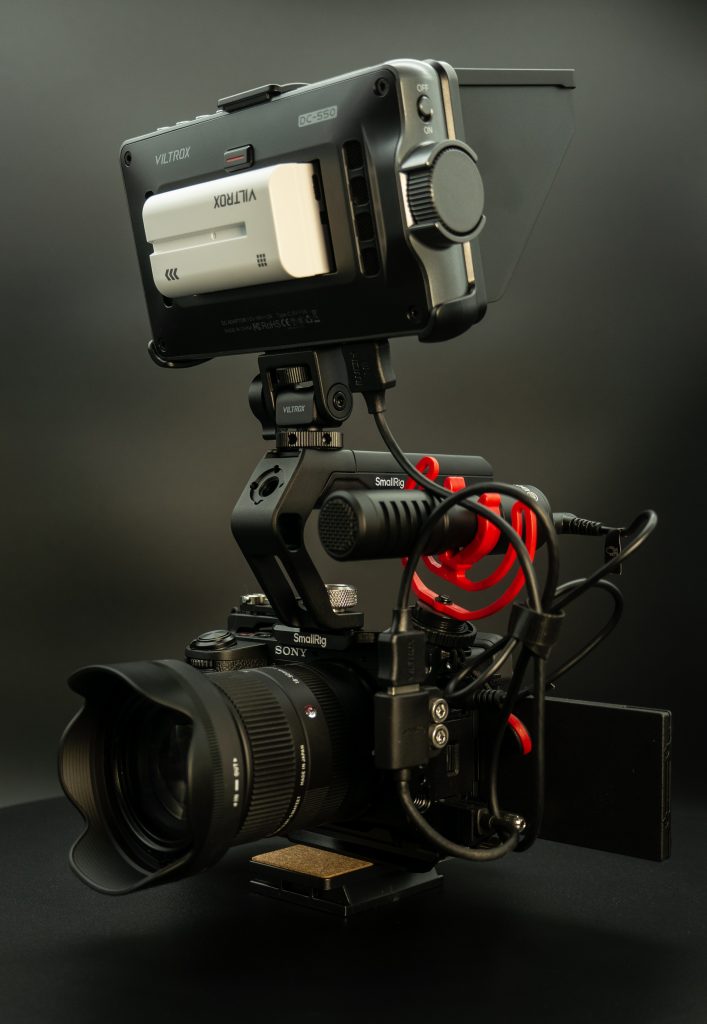
Camera cage: necessary to protect camera body and to add lots of various mounting options for other equipment. For me, the best two options are either SmallRig 4336 or Tilta Lightweight Kit. Both are excellent options. And both feature micro-HDMI port protection, which is a must for a6700, or you are risking to rip it off. I went with SmallRig + additional upper/lower handle + micro-HDMI to HDMI adapter.
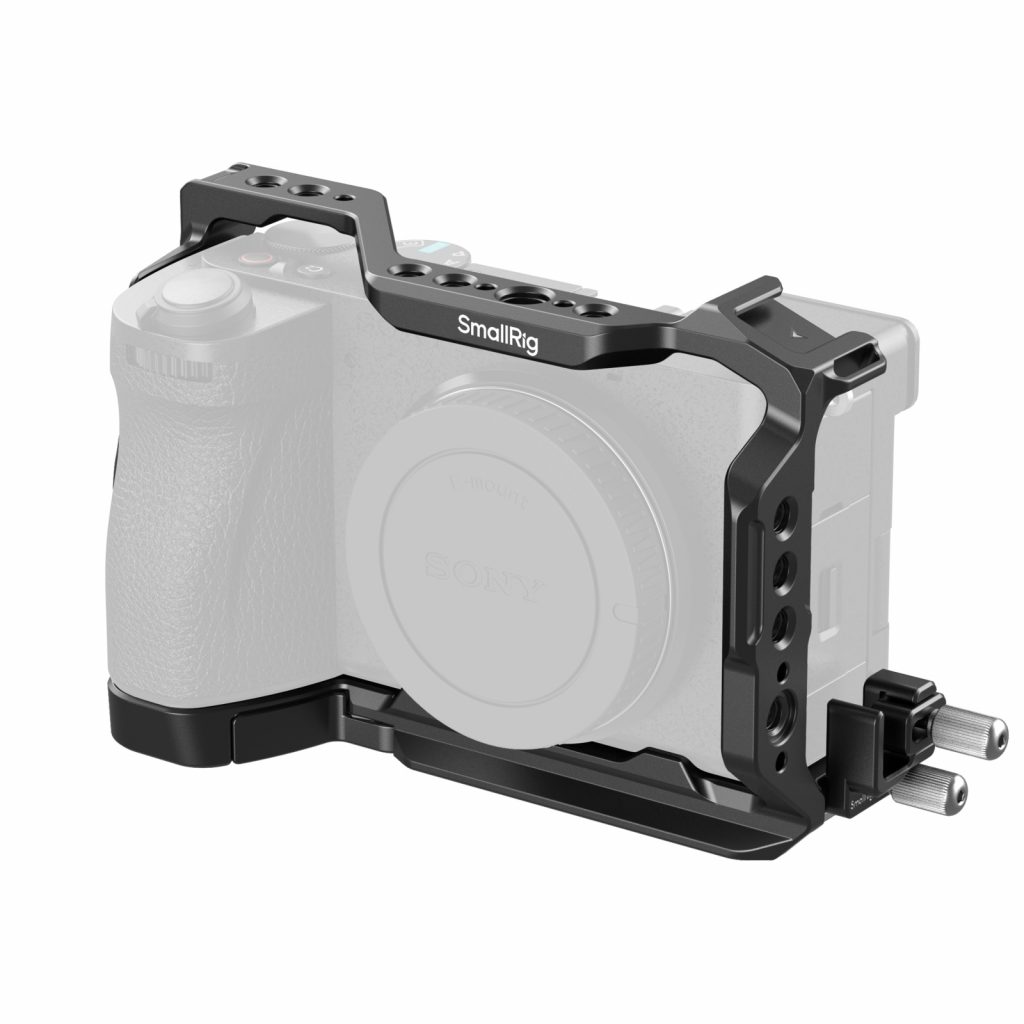
I’ve also bought no-name additional cold-shoe for this cage and ARRI to external monitor holder. Also planning to get side handle for better grip with full setup. The only problem with this cage is when you use micro-HDMI clamp, 3.5mm audio monitoring port would not be accessible. But I can assure you that this is minor issue since same ports are available either on the external monitor or even in your gun mic. Tilta version of the cage, as I understand, obstructs this port similarly.
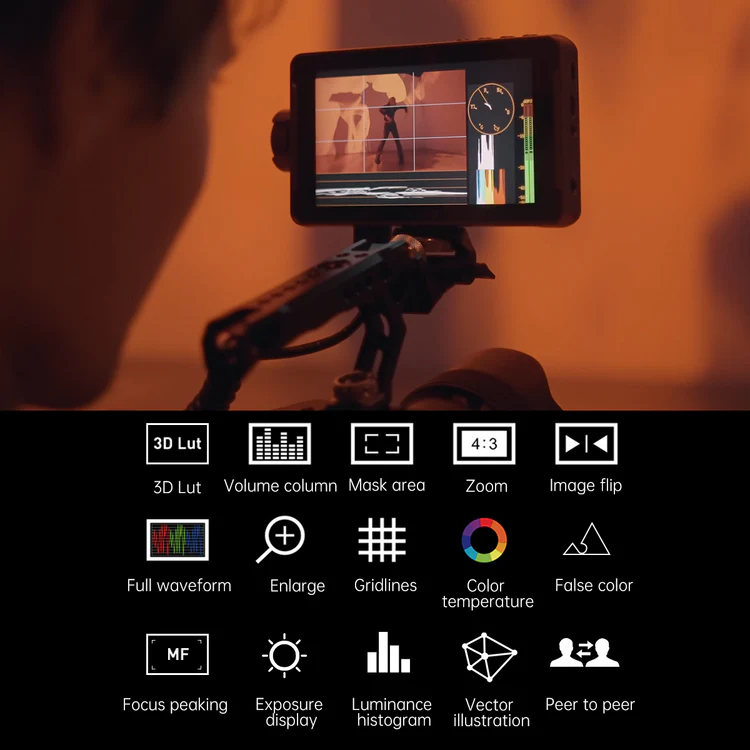
External monitor: necessary since the camera is more convenient to shoot when held by the top handle when its own monitor would not be visible. Moreover, external monitors usually provide more brightness, have hoods, have the additional software aiding functions like waveforms, false colors, de-squeeze, zooms, etc. My choice is very affordable Viltrox DC-550 (not PRO, not Lite) with touchscreen. It has 1200nits of brightness, comes with the removable / folding hood, battery (can be powered from type-C and 12V barrel connector, as well), has 2 mounting options, audio monitoring 3.5mm output and packed with all necessary functions and overlays like focus peaking, zebra, custom LUTs, waveform, false colors, etc. It also comes with cables and good mounting solution for 1/4inch threaded holes. What it didn’t come with is micro-HDMI to HDMI (only had full HDMI to HDMI and mini-HDMI to HDMI cables). So, I’ve got this cable from SmallRig.
One tip: you can go with Monitor+ app for Android / iOS that does the same job and even more – it shows you the picture from camera using wire or wireless, has all types of overlays and even controls your camera settings (even does focus pulls and touch to focus). This app is great. The only drawback is the stability of framerates over the wire or wireless. In both case it might drop some frames, resulting in non buttery-smooth picture. Decide for yourself.
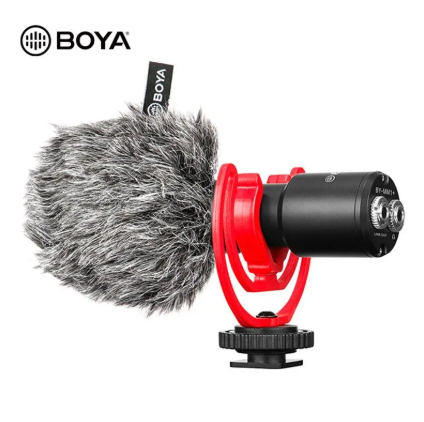
Gun microphone / wireless microphone / wired lavalier: absolutely a must to have wireless and gun mics. Gun mic can reach further and capture with better clarity than in-built mics, while wireless mics are necessary to record speech sound. For gun – I’ve got very popular and cheap Boya BY-MM1Plus with cold shoe mount and external monitoring output.

Boya Boyalink 2 is my choice for wireless system (2 mics set with 1 receiver + powerbank) which allows to record stereo / mono or 2ch sound depending of the configuration. I love Boya products and usually chose those over DJI, Rode or anything else. And I know, there are much better gun mics like Comica VM or Rode, but I am good for now with much cheaper option.
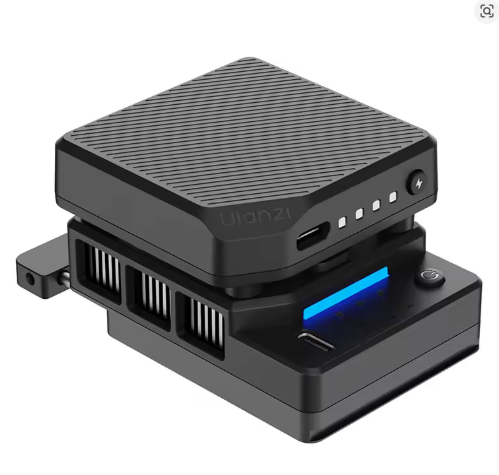
Active cooling: since a6700 doesn’t have active cooling and can potentially overheat / switch off in the middle of the session, I’ve decided to add Ulanzi fan with battery to my setup. It fits into monitor niche and can be powered from type-C or battery. And it perfectly fits and balances on my gimbal. I’ve tested this setup and didn’t see any signs of overheating even when temp limit was set to normal instead of high in camera menu. Fingers crossed, it would save a6700 from overheats forever. Its fan is audible, but not distracting the video when gun mic is used.
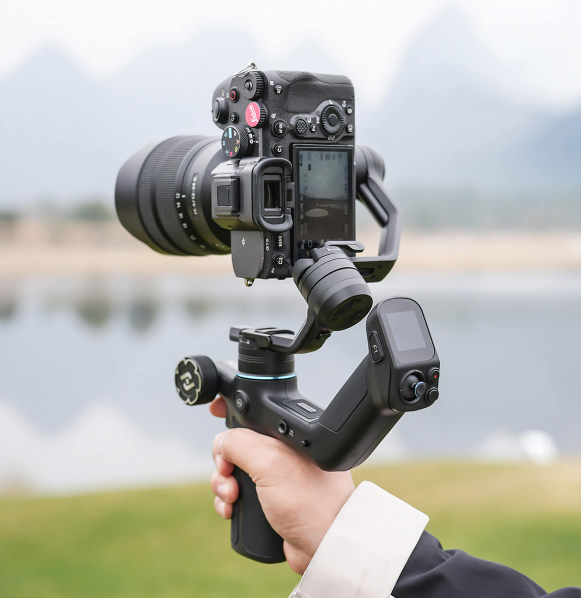
Gimbal stabilizer: again, I have my own preferences and avoid DJI products at all costs. This is a long story with a roots to those time when DJI ruined / stole drones and gimbal tech that was achieved in DIY field (just a reminder that it all existed long before DJI stepped in) and left many people without income, jobs or further interest. Anyway, current consumer / prosumer DJI products are often hanging behind and cost inadequately, therefore, I went with Feiyu-Tech Scorp Mini 3 PRO due to the following reasons:
- small and lightweight, with the capacity of 2kg
- removable handle with remote control over gimbal
- AI module built-in and covers pretty long range, gesture control, follows you
- universal for mirrorless cameras and smartphones
- can control a6700 over BT or cable
- very long battery life
- rich set of accessories
- vertical / horizonal shots
- doing excellent in stabilization and other modes
- has an option of follow focus
- super cheap
Gimbal would not be the main gear in my case, spending a lot on such device was not an option. But I’ve managed to find one that does a great job and is packed with the features like no other. Here is the example of me testing it with a6400 + 18-135 3.5-5.6 lens (25p, Slog2, OSS on, with VND filer, regular (no ninja) walking) on long and short ends. Later, I have balanced the roll axis more precisely and it eliminated minor stab issues even at the long 135mm end without rebalancing from 18mm.
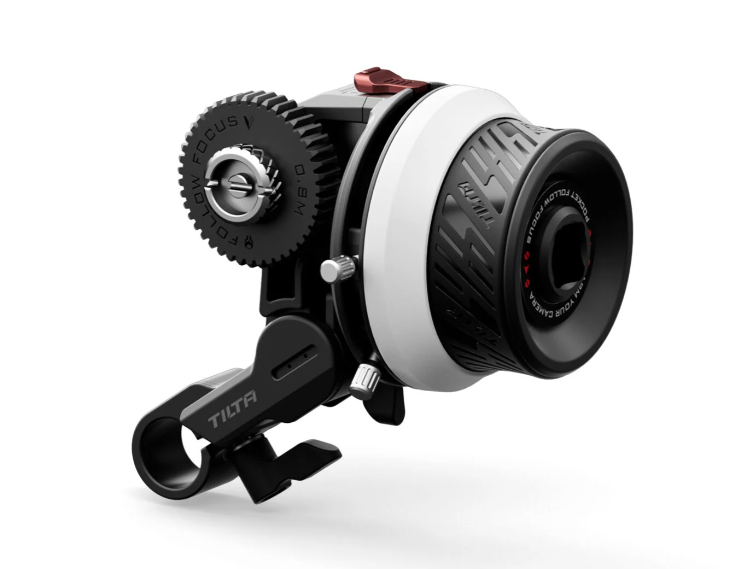
Manual follow focus, rods, holders: for the better focus control and shifts in video, I still believe that manual focus mode is a must. AF does a great job but for the reason of art, slow or A/B focus pulls, plane selection, etc – all still should be performed manually. This can be achieved with manual mechanical or wireless follow focus systems (pullers) that are available from SmallRig, Tilta and many other brands. I’ve ordered Tilta manual follow focus because I like it more than SmallRig and to save some cost. Similarly to SmallRig, it is compatible with any 15mm rods to mount on the camera rig.
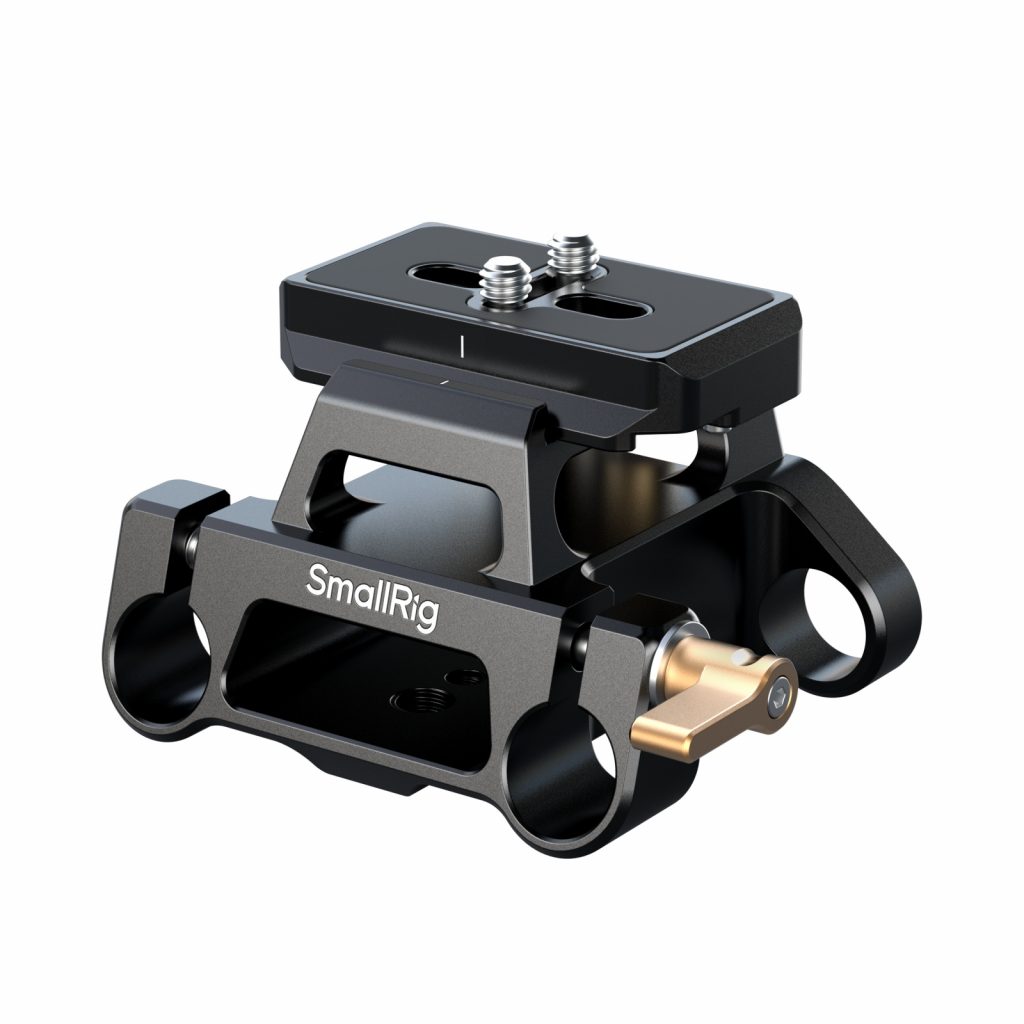
For example, this is a good rod holder / base plate that accepts 15mm rods and acts as a mount for camera cage with Arca-Swiss type holder. Such kit with 25-30cm (in length) rods would be a good option for holding follow focus, V-battery (about that later), matt box (if needed), lens support – all at the same time. And it can be easily attached/removed from camera cage and / or tripod with 1/4inch / 3/8inch screws.
One more accessory for the follow focus is the rubber ring with 0.8 tooth mod that would go over the lens focus or zoom rings and allow follow focus gear to rotate it. 0.8 is a standard but the ring diameter varies. I’ve got a set for my lenses by Tilta.
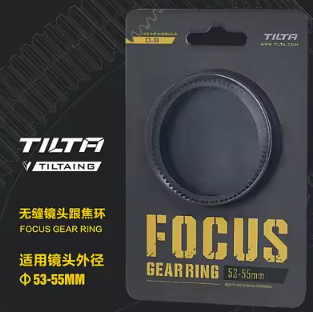
Understanding which one would fit is not a problem: measure the diameter of focus ring on your lens in mm and divide it by 3.14. You’d get an approximate diameter of the focus ring you need. Better to choose the one that equals to your calculations with its least number. And why not using the adjustable ring that comes with follow focus – cause it would distract your movements with its joint. Cinema lenses, usually, are equipped with 0.8 teeth on focus rings by default.
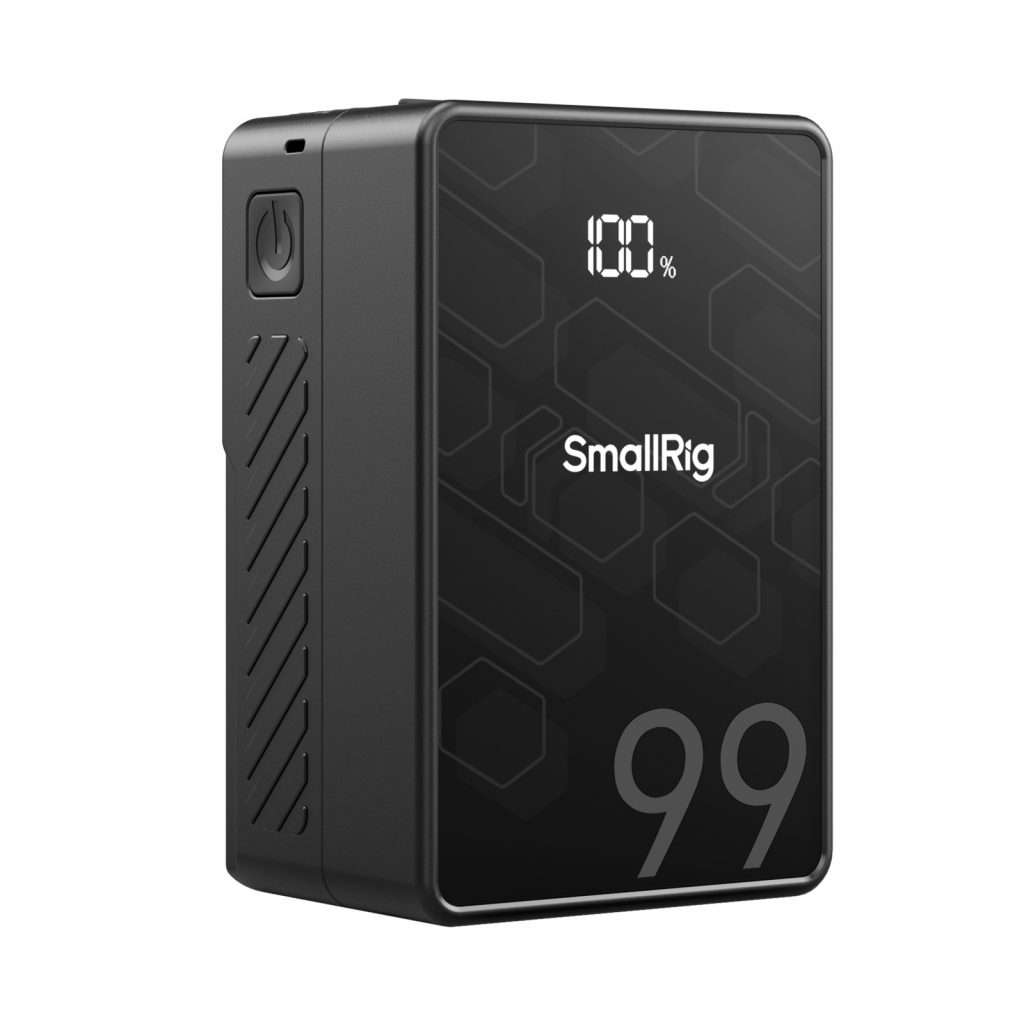
Power options: the easiest and the cheapest way is to power everything from power bank with type-C cables directly. But, in case of the dummy type-C or wall outlet power adapter battery for camera – I’ve seen some negative reviews that such dummy batteries caused significant damage to electronics and the camera has to be fixed (caused by sudden voltage spikes). Plus, my own experience with such battery and a6400 camera showed that mechanical shutter overpowers the dummy battery and camera shuts down. Moreover, too many long cables would limit the functionality and increase the risk of dropping camera or its accessories. On the other hand, never seen any negatives about dummy batteries with D-Tap interface that are fed from V-mount batteries. Plus, such dummy battery also reduces heat inside the camera since the element itself is not heating up.
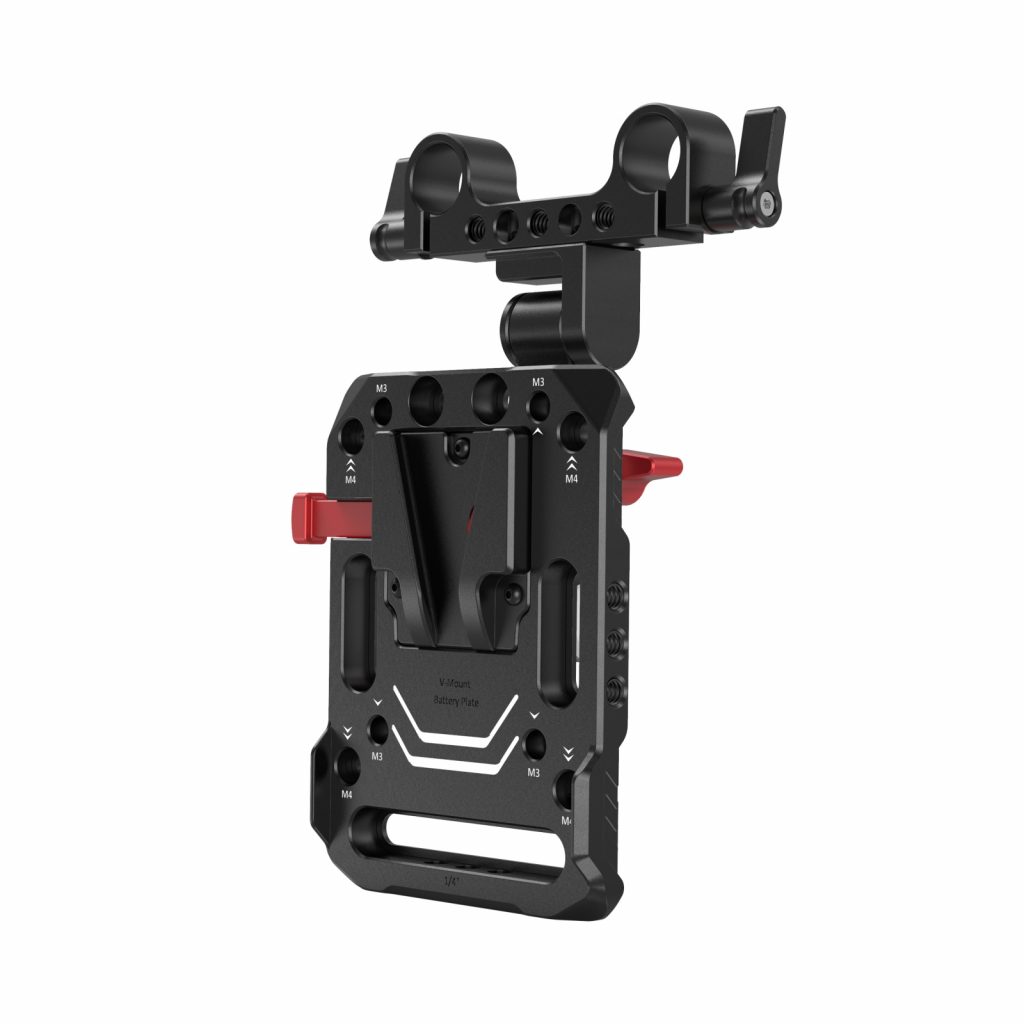
Therefore, I am planning to get V-mount battery holder and V-mount battery from SmallRig or any other brand to feed all of the accessories and camera itself. Such V-mount holder would fit to 15mm rods and allow for the best weight distribution of the whole rig when the battery would be mounted at the back. Plus I’d need V-mount battery itself and D-Tap dummy battery for a6700. The rest of the accessories would be powered with type-C cables from the same battery.
Software and workflow: here is the list of software I am using and planning to dive deeper into:
- DaVinci Resolve – very popular video editing tool, mostly famous for its endless color grading abilities and most of the functions available even in free version.
- Gyroflow – additional stabilization based on gyro data. Great that a6700 records this data to meta by default. Free, excellent software. There is also Gyroflow plugin available for DaVinci.
When color grading SLog3 in DaVinci, I’ve learned that the best way to preserve max amount of data is to convert from Slog3 to DaVinci wide gamut as the first CST node and back to Rec.709 as the last CST node (after which you can add nodes with LUTs). All of corrections and grading should be done between those 2 CSTs.
That is it for now. I am still waiting for the follow focus to arrive and still considering V-mount batteries. But everything else is ready for experiments and practice. Hope that this article would help someone with the understanding of first video rig build and with the choice of some components. Feel free to provide your feedback in comments section or to give an advice on accessories or the workflow. I would share more posts after discovering something new or having some good results.