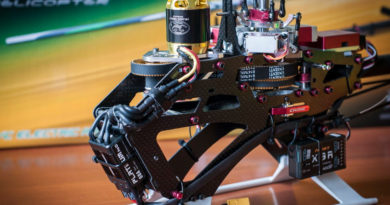
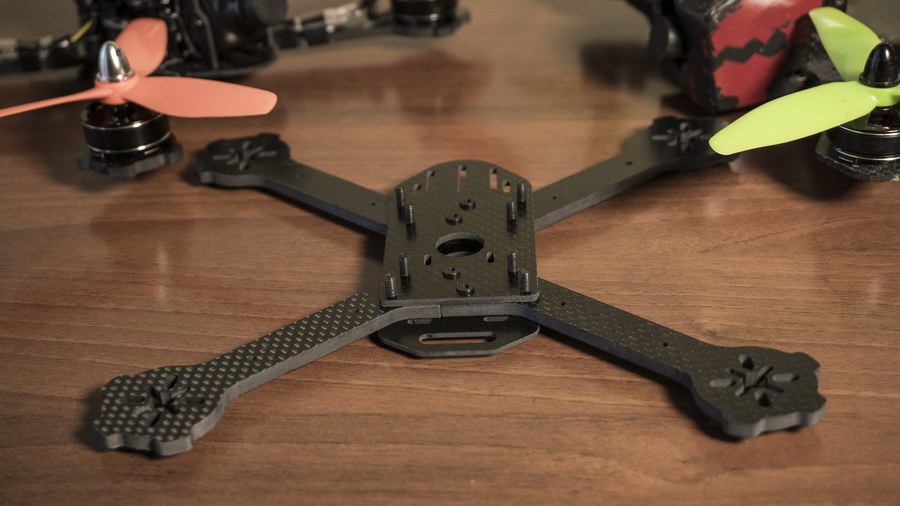
KDS Kylin 210 racing copter frame
KDS — the leading R|C manufaturer in China is well known brand around the world for many talented and skillfull pilots. Not only this brand carries many leading-tech sub-brands production processes but also present its own, well made and perfectly crafted products that are gaining their popularity very fast.

Today, I want to share the new KDS Kylin 210 FPV racing copter frame build process, talk about its advantages and overall opinion about using it.

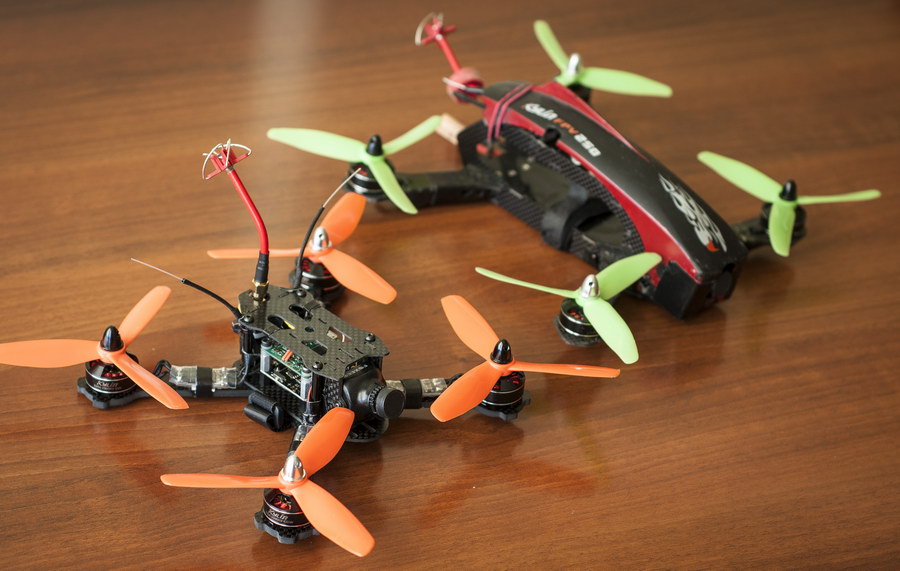
Last season, I’ve been using KDS Kylin 250 (280) RTF kit frame and setup and I want ot mention that despite more than 1000 flights and many crashes with some bad ones, this frame is still alive and flies perfectly.

The only drawback that it has currently is not due to its quality but rather due to the shifted pilot experience and demand. Kylin 250 is an excellent product but currently can compete on par only with other 250-class copters. This brings an issue when any competition series would not separate 180 class copters from any other classes and forces anyone to compete in one session despite the fact of totally different flight weights and setup power. Therefore, when it comes to participating in some events, we have to stay tuned to others setups and be on par with those.

KDS Kylin 210 frame is aimed to remove this difference. Recently, it looks like pilots have chosen to fly 200-210 class as the mainstream and Kylin 210 perfectly fits there.
The price of the frame is not much to talk about — only $23. Many frames cost much more than that. But even having such low price, this frame is not a compromise…


It comes in a bag with all necessary screws, carbon fiber plates and plastic mounts to complete the setup. Unfortunately, I couldn’t locate any assembly manual for that and this is the reason I am writing this short review.
In the bag:
- Four 4mm carbon fiber arms
- One 2mm carbon fiber base plate
- One 1,5mm carbon fiber battery plate
- One 1,5mm carbon fiber top plate
- Two 2mm carbon fiber camera mounting plates
- One 2mm carbon fiber VideoTX back plate
- Four alluminum standoffs
- Four plastic standoffs
- A set of M2 and M1.5 screws to join everything together
As you’d expect — this frame is fully carbon fiber material with plastic standoffs placed 30,5mm diagonally to accept any current flight control and PDB boards.

So, I would summarize all features:
- 30,5 mounts for any current FC and PDB boards
- Camera holders spacing to accept the most famous cameras like Foxeer or RunCam
- Special holes at the top plate to accept additional ring camera holders
- Plenty of room between bottom and top plates to have the 2-4 layer electronic sandwich
- Universal motor mounting holes to accept wide motor range
- Special top plate openings for VTX antenna connector
- Battery plate spaced from bottom plate to accept battery strap
As you can see, no problems here. Frame is capable of accepting any current racing electronics and is easy to work with.
Now, lets talk about the technical design in terms of durability:
What I’ve noticed in terms of «designed» durability is 4mm thick arms that have some «puzzle» design at the frame ends so that they would make one piece when placed toghether. This would definitely add much to the durability of each arm in case if force is applied from the front and sides.

Most of the force would be evenly spread around all screws and both arms at joints. Moreover, each arm has 3 screws and all 3 come through all 3 buttom parts — battery plate, arm and base plate. From that, I can make a prediction that this frame would last quite a long time.


All joints are well designed as well. Not only they retain parts but also kept minumin and serve a second role of supporting something else. Clever way of designing.
Lets assemble a frame:
- Take a base buttom plate, couple of arms, battery plate, 2 longest M2 screws and 2 M1.5 screws.
- Hold the base plate so that metal thread holes would be facing down (straight side is back).
- Take one arm, place it on top of the base plate and align it so that its 3 holes would correspond to 3 holes of a base plate.
- Take battery plate and place it over the arm so that its 3 corner holes would align with arm holes. (Part with wide opening is back)
- Put 2 longest M2 srews through 2 outer holes off all 2 plates and arms assembly.


- Do the same for the rest of 3 arms.
- Take 4 aluminum standoffs and screw it on each of 4 screws furthest from the center of the frame.
- Take 4 M1.5 screws and put them through the whole assembly starting from battery plate, through arms and to the base plate threaded holes.
- Take 4 plastic standoffs and place them on top of the rest inner 4 long screws.


- Take 2 camera mounting plates, align its base with frame openings in front and near aluminum standoffs.
- Take VTX back plate and align it with the openings in battery holder plate.
- Cover everything with the top plate and use 4 shorter M2 screws to tie it to the aluminum standoffs.


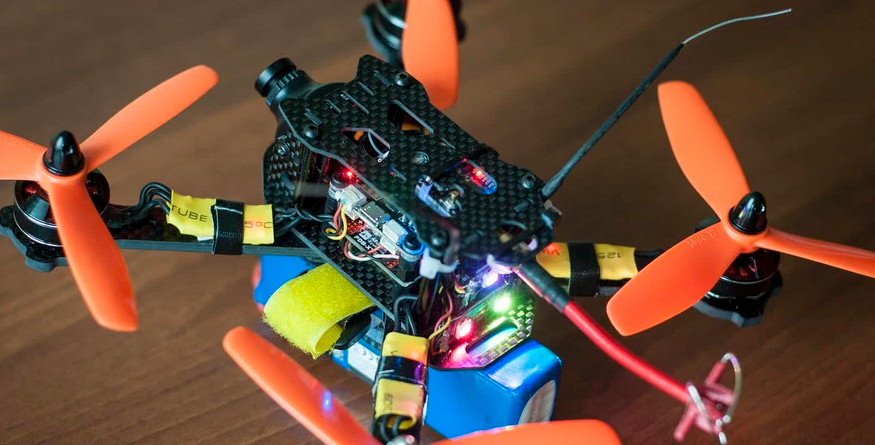
- That is it. KDS Kylin 210 frame is assembled.
Everything fits perfectly well. I really enjoyed assembling this frame.
For my flying setup, I’ve chosen the following electronics:

- KDS Kylin 2204 2300KV motors
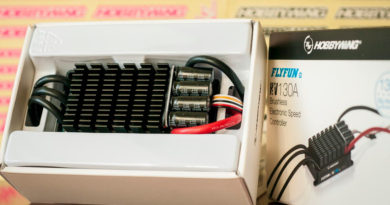
- KDS Kylin 20A ESC (OneShot125)
- FrSKY XSRF3E (F3Evo board with integrated XSR RX), BetaFlight
- Some regular PDB
- Foxeer 700TVL CMOS FPV cam
- KDS Kylin 5,8Ghz 600mW VTX
- Aomway 5.8Ghz cloverleaf antenna
- Some addressable LED strip
- KingKong 5045-V2 3blade props
- 1,300mAh Bonka 45-90C 4S
In my setup, I have only 2 layers of electronics because the receiver is intergrated into F3Evo flight board. But even if it is not — there is still a plenty of room between bottom and up plates to fit separate RX, buzzer and other parts. And action camera can be easily mounted on top because it is kept clean from anything else.
The flight season has not started yet here. The weather doesn’t allow some good flight sessions but from what I’ve tried — I can conclude that this frame and setup is much more ineteresting, powerful and lightweight in comparison to 250 class.
Kylin 210 with FC F3 Acro only weights — 94,5g.

My total setup weight: 288g. And my total flight weight with the battery — 440g. This is almost 100g less than the corresponding setup on 250 class frame. Seems that it would help a lot to have some more flight time, to compete on par with other 210 class frames and setups and to have some extra fun during the 3D freestyle. Can’t wait for a good weather to give this copter a really good try…


KDS Kylin 210 frame could be purchased HERE
Build a second frame with slightly different setup:
Cam: Foxeer 700TVL
VideoTX: 5.8GHz KDS Kylin 600mW
Antenna: clover, Aomway
Flight board: SpRacing F3Acro
Power DB: Matek
Motors: KDS Kylin 2204 2300kv
ESC: KDS Kylin 20A OneShot125
LiPO: FlyMod.net 1,300mAh, 4S, 45-90C
Props: 5x4x3